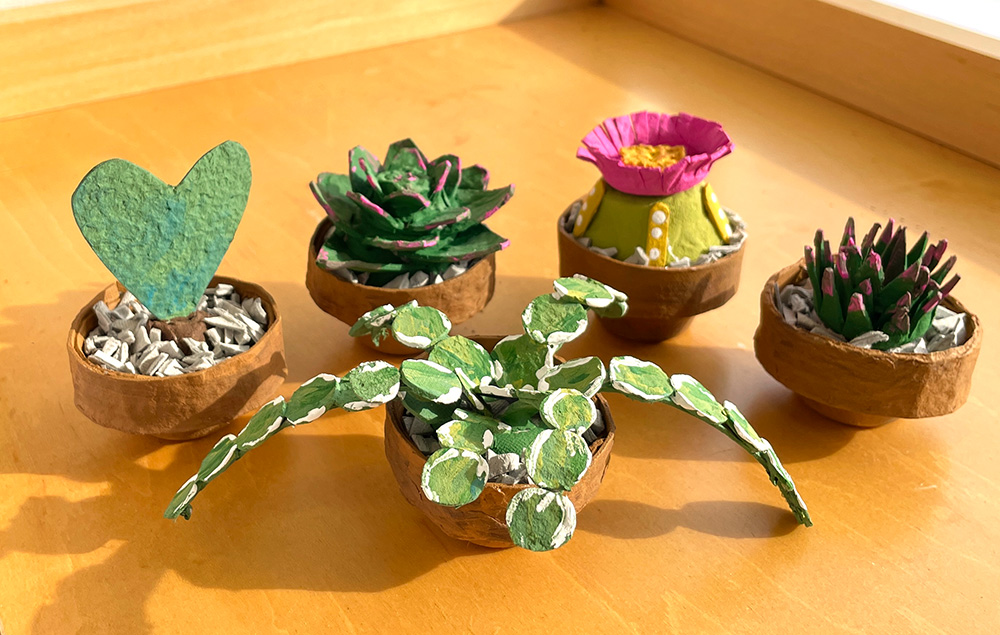
Egg carton succulents are an eco-friendly craft where recycled egg cartons are cut, shaped, and painted to resemble realistic succulent plants. Perfect for Easter when egg cartons are plentiful, this project combines sustainability with charming spring decor.
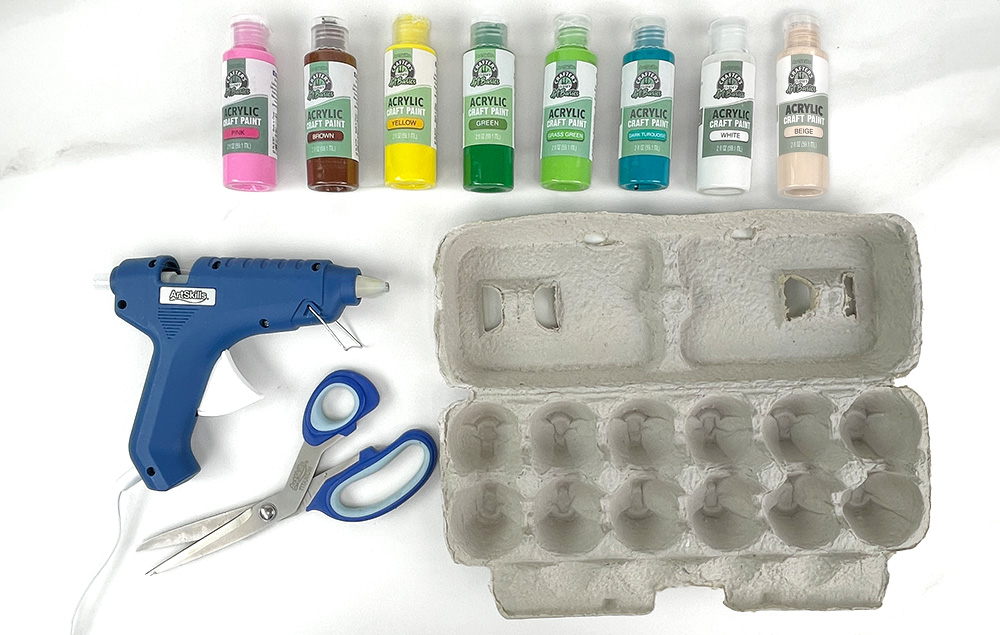
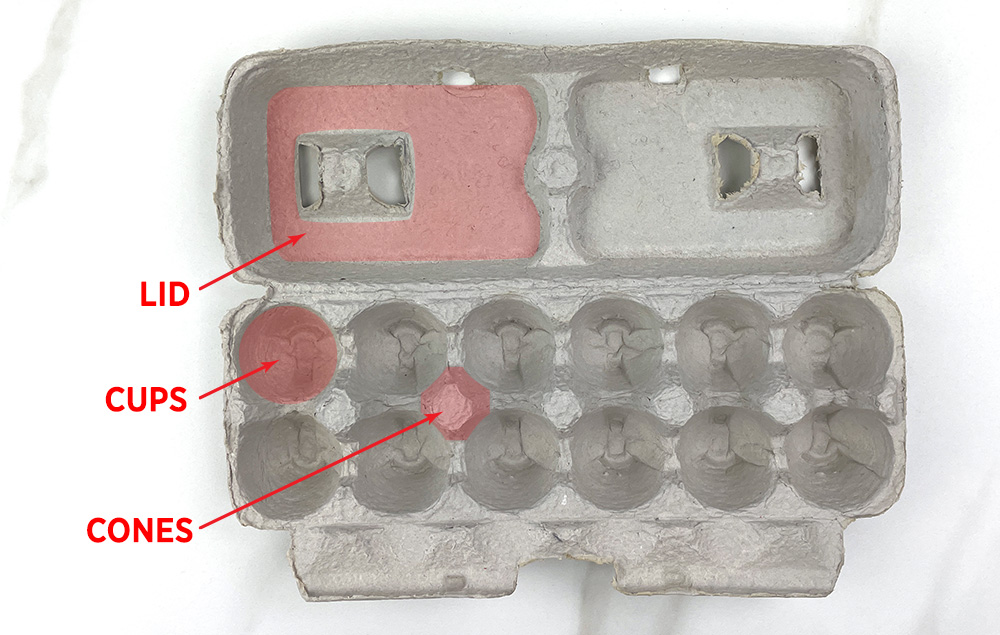
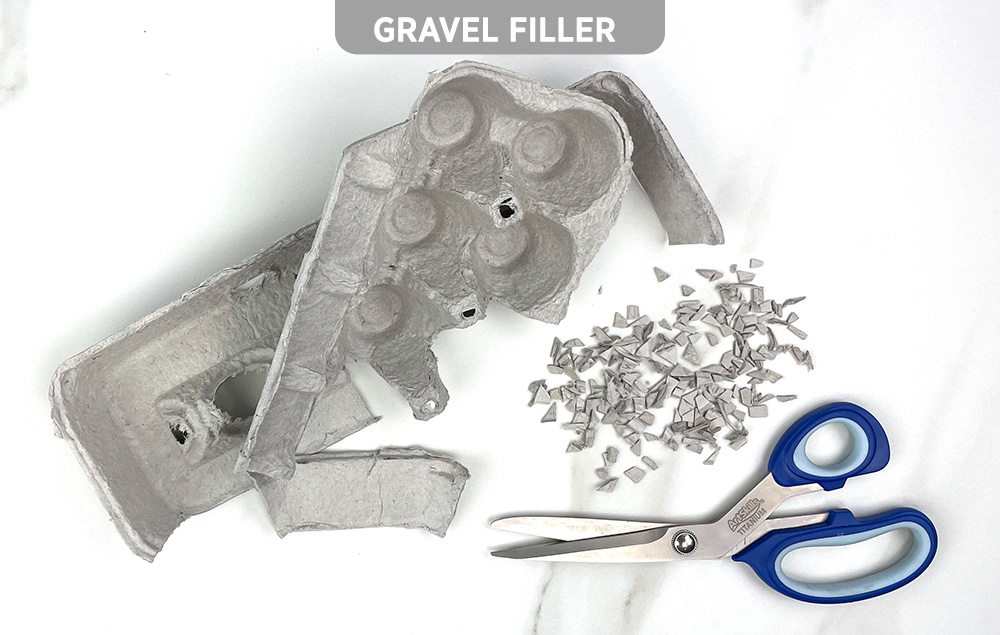
A) Use as much of the egg carton as you can: the cups, the cones, and the flat areas on the lid. Note: Scissors are used to cut out and shape all of the pieces.
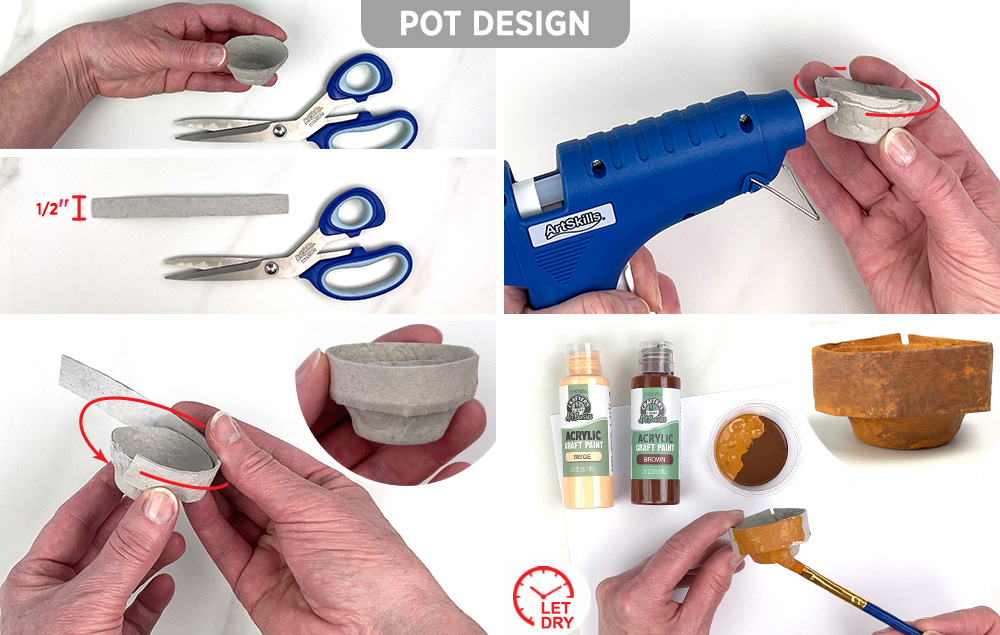
STEP 2:
A) Cut a cup from the egg carton. Cut a 1/2" wide strip from the egg carton lid.
B) Apply hot glue around the top edge of the cup.
C) Attach the strip to the hot glue, creating a lip around the top edge of the cup. Trim any excess.
D) Paint the pot shades of brown. Let dry. Note: You will need to make five pots to make each of the succulents.
STEP 3:
A) As you are cutting out pieces for the pots and succulents, save the scraps. They can be cut into very tiny irregular pieces (about 1/4") to resemble gravel.
STEP 4:
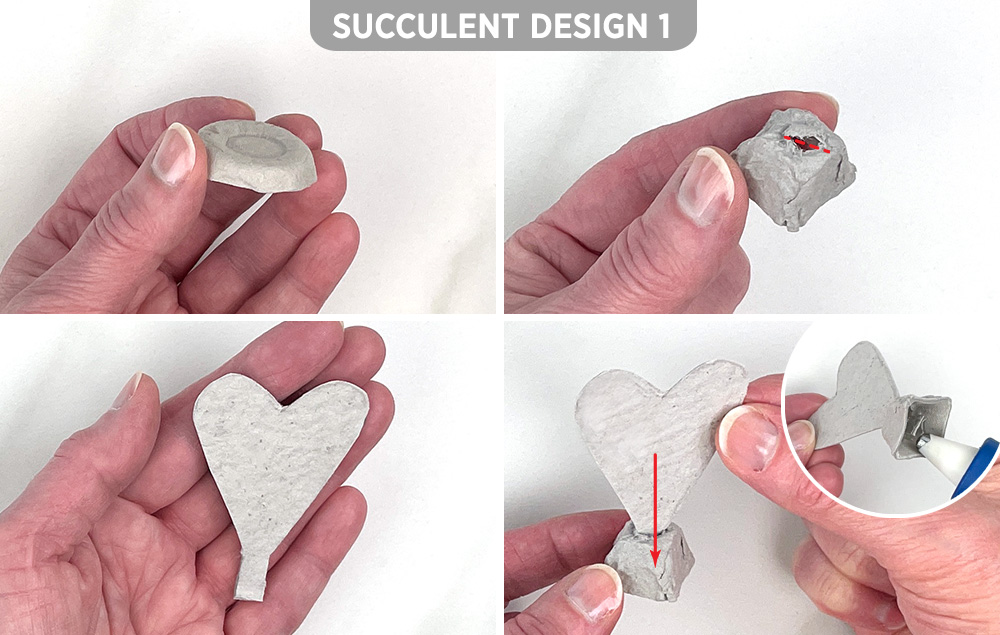
A) Cut out the bottom of a cup from the egg carton. Note: It should nestle into a pot when placed upside down.
B) Cut out the end of a cone from the egg carton. Cut a slit in the top.
C) Cut a heart shape with a tab on the bottom from the egg carton lid.
D) Insert the heart tab into the slit on the cone. Hot glue the tab to secure it in place inside the cone.
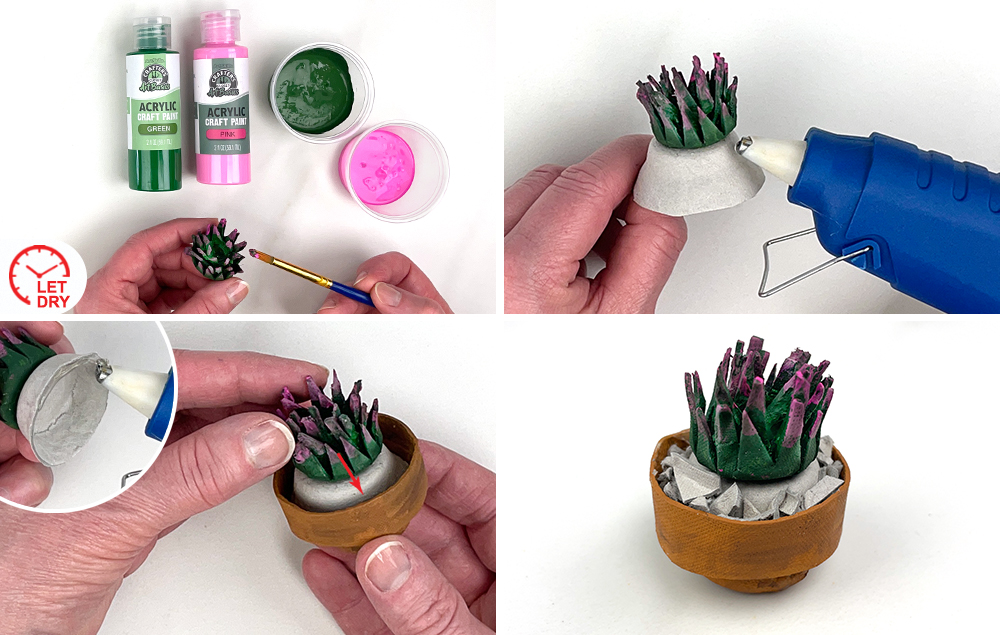
STEP 5:
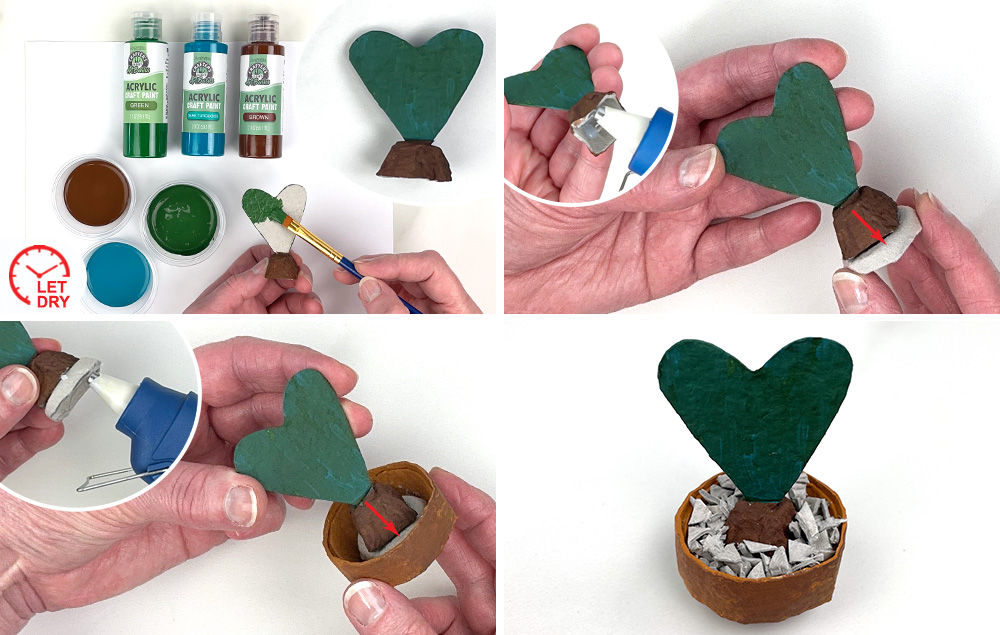
A) Paint the cone brown and the heart green with touches of dark turquoise. Let dry.
B) Hot glue the succulent to the cup from Step 4a.
C) Hot glue the cup and succulent into the pot.
D) Add the gravel filler by sprinkling it around the edge of the pot.
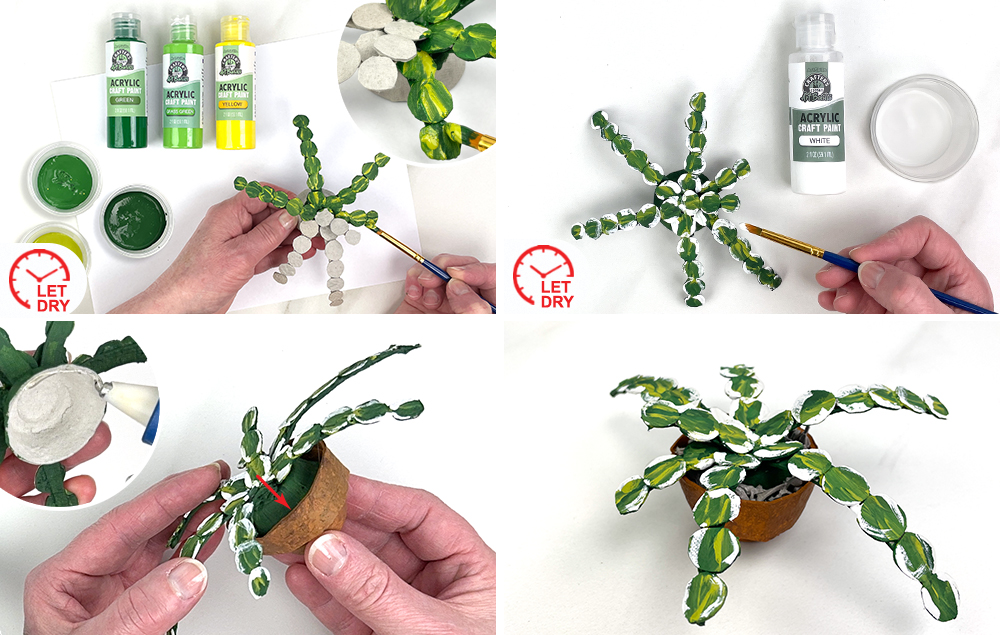
STEP 6:
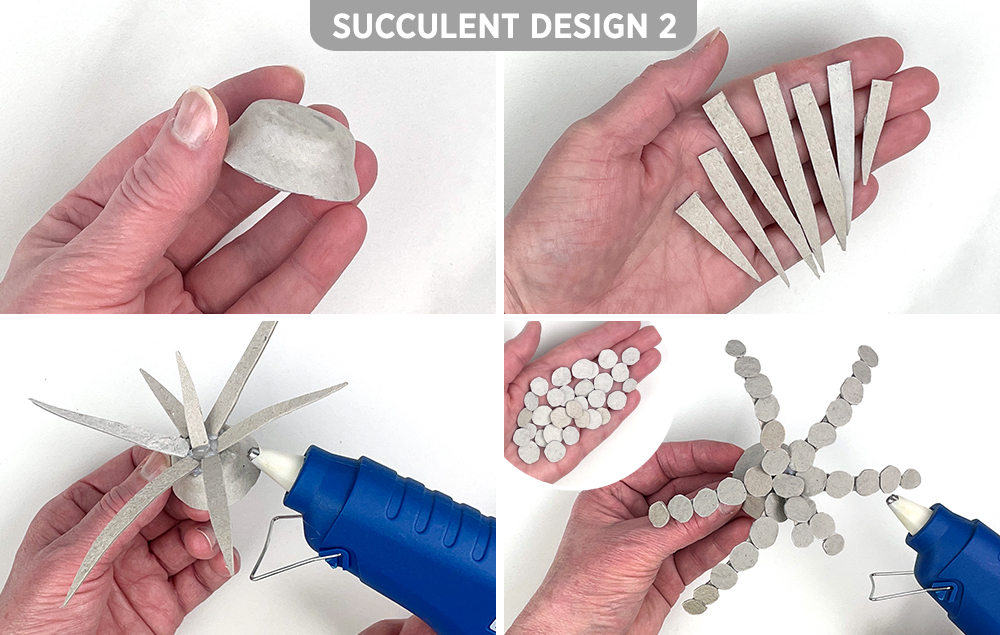
A) Cut out the bottom of a cup from the egg carton. Note: It should nestle into a pot when placed upside down.
B) Cut thin, pointy strips from the lid of the egg carton. They can vary in length.
C) Hot glue the strips to the upside cup to resemble leaves on a plant.
D) Cut circle pieces from the egg carton lid and hot glue them to the strips.
STEP 7:
A) Paint the succulent shades of green, making sure to also paint the upside down cup. Let dry.
B) Add highlights along the edges of the leaves with white paint. Let dry.
C) Hot glue the succulent into the pot.
D) Add the gravel filler by sprinkling it around the edge of the pot.
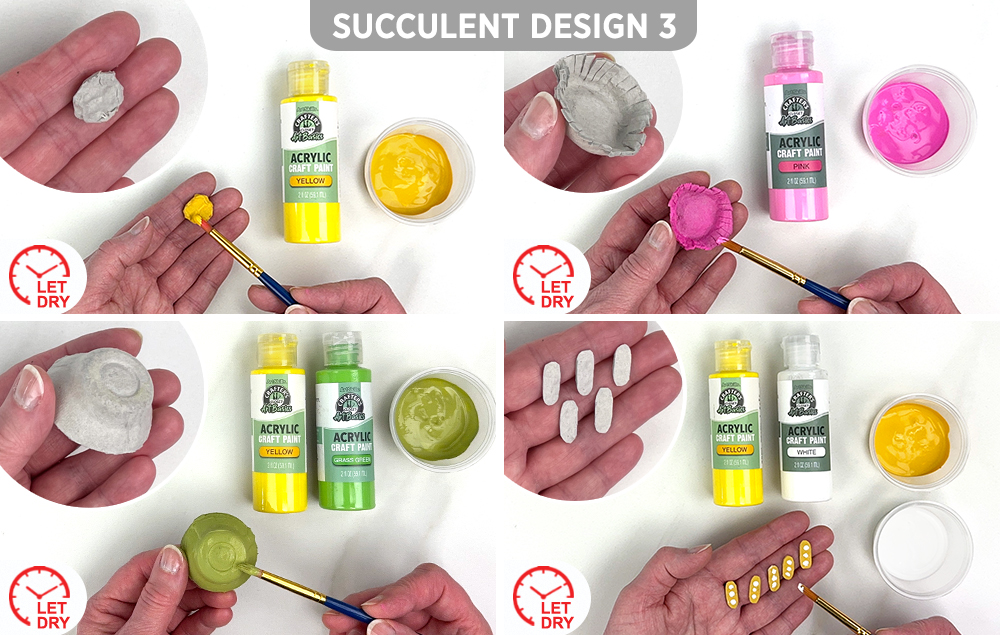
STEP 8:
A) Cut a circle from the egg carton lid. Paint it yellow. Let dry.
B) Cut the bottom of a cup from the egg carton. Cut fringes around the edge to make a flower. Paint it pink. Let dry.
C) Cut a cup from the egg carton. Note: Make sure it fits upside down into a pot. Paint the cup green. Let dry.
D) Cut five tiny ovals from the egg carton lid. Paint them yellow. Let dry. Add white dots to the yellow ovals. Let dry.
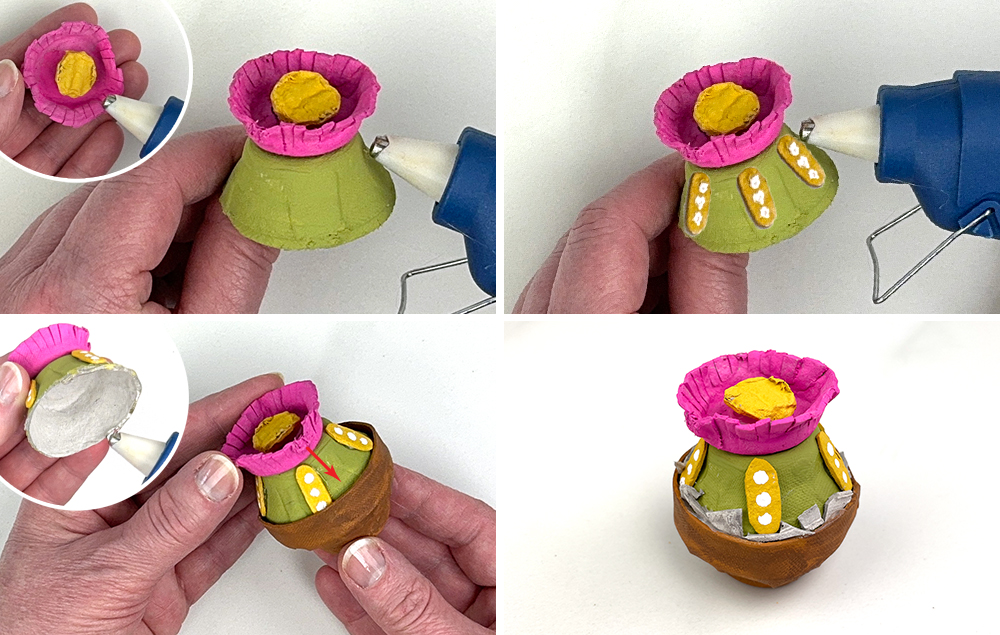
STEP 9:
A) Hot glue the yellow circle to the center of the pink flower. Hot glue the flower to the top of the green succulent.
B) Hot glue the yellow ovals to the side of the green succulent.
C) Hot glue the succulent into the pot.
D) Add the gravel filler by sprinkling it around the edge of the pot.
STEP 10:
A) Cut out the bottom of a cup from the egg carton. Note: It should nestle into a pot when placed upside down.
B) Cut the bottom of a cup and the tips of two cones from the egg carton.
C) Cut points into the three pieces from Step 10b.
D) Hot glue the three pieces together.
STEP 11:
A) Paint the succulent green. Add pink highlights to the tips of the leaves. Let dry.
B) Hot glue the succulent to the upside cup from Step 10a.
C) Hot glue the succulent into the pot.
D) Add the gravel filler by sprinkling it around the edge of the pot.
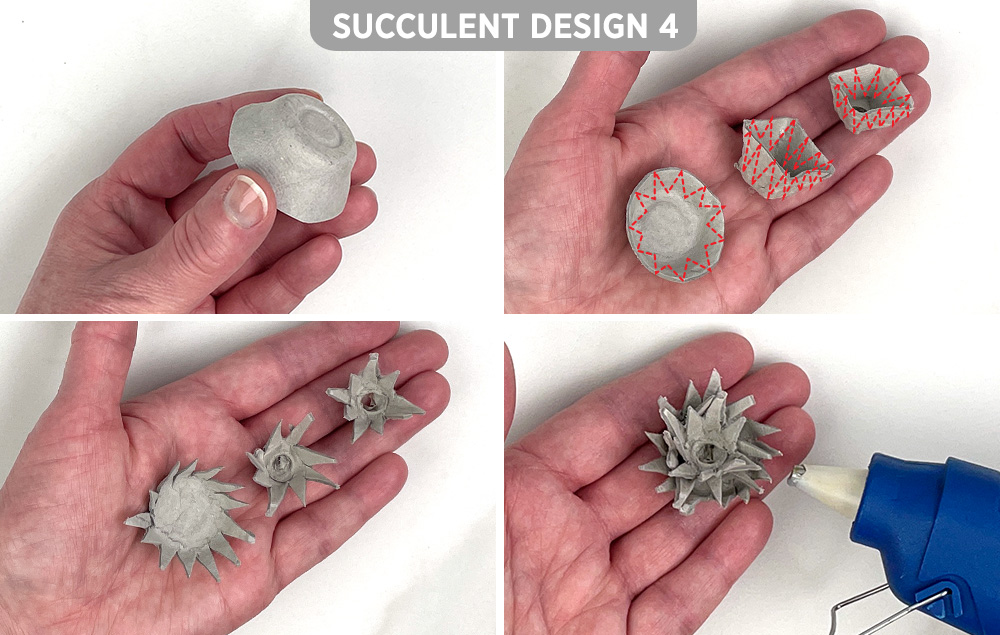
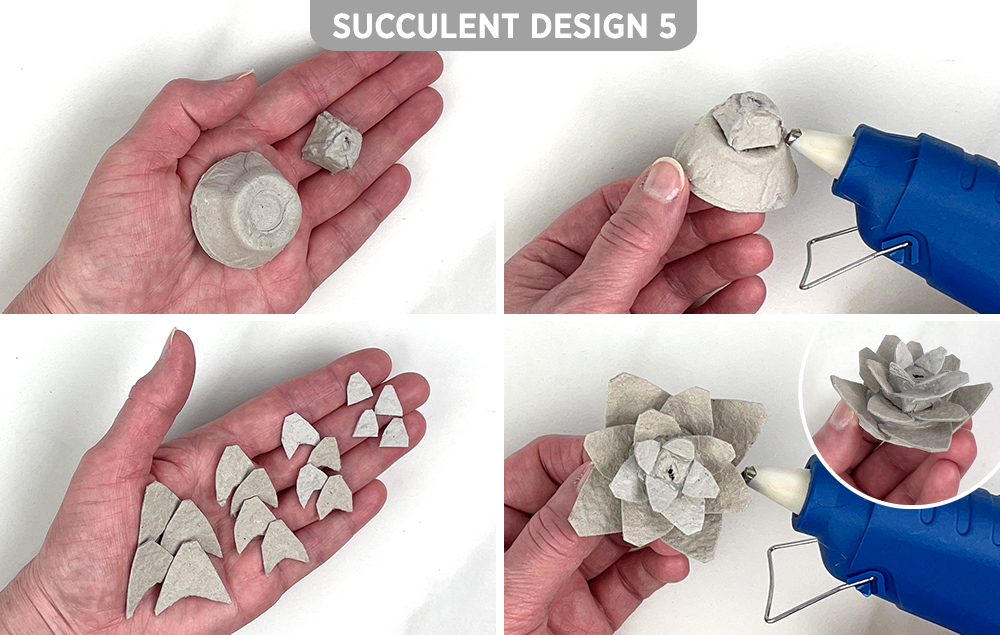
STEP 12:
A) Cut a cup and the tip of a cone from the egg carton.
B) Hot glue them together with the cone stacked on top of the cup.
C) Cut leaves from the lid of the egg carton. You will need 4 extra small, 4 small, 4 medium, and 4 large leaves. Tip: Cut slight curves into the base of each leaf so it will sit tight against the main part of the succulent.
D) Hot glue the leaves to the main part of the succulent. Start with the smallest leaves at the top, and then add successively larger leaves as you go down. Make sure to stagger the leaves on each level.
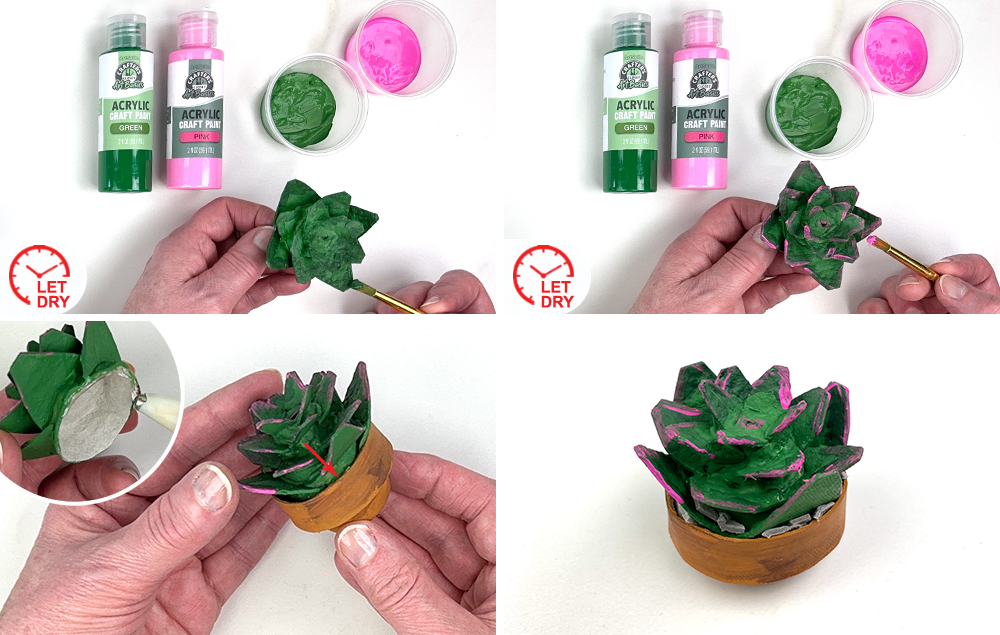
STEP 13:
A) Paint the succulent green.
B) Add pink highlights to the edges of the leaves. Let dry.
C) Hot glue the succulent into the pot.
D) Add the gravel filler by sprinkling it around the edge of the pot.
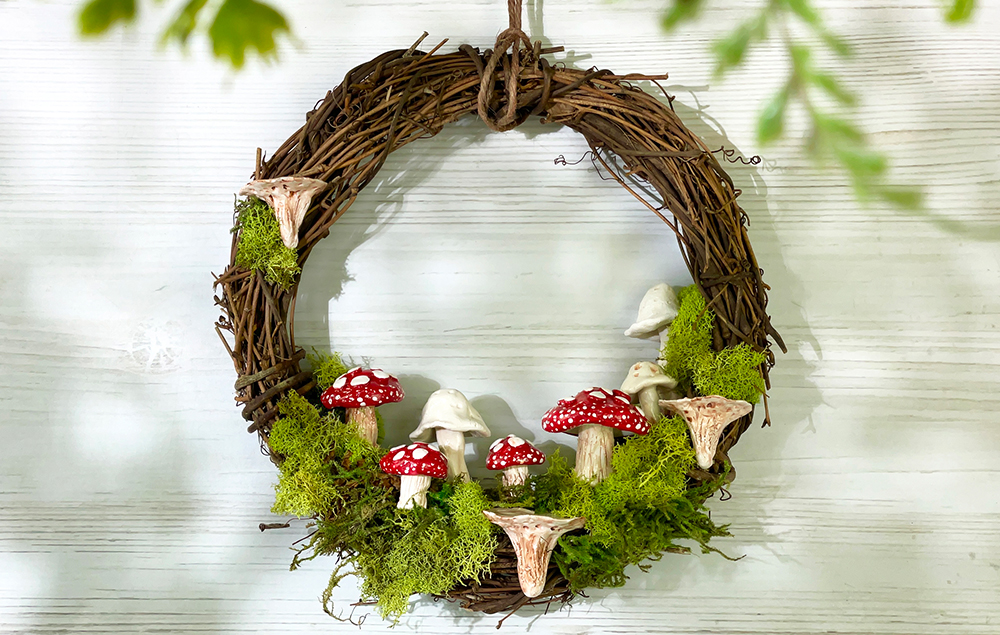
Embrace cottagecore decor this spring with this enchanting mushroom wreath craft. Nestle intricately crafted clay mushrooms amidst lush moss on a grapevine wreath, creating a whimsical woodland scene that adds a touch of charm and natural beauty to your home this season...
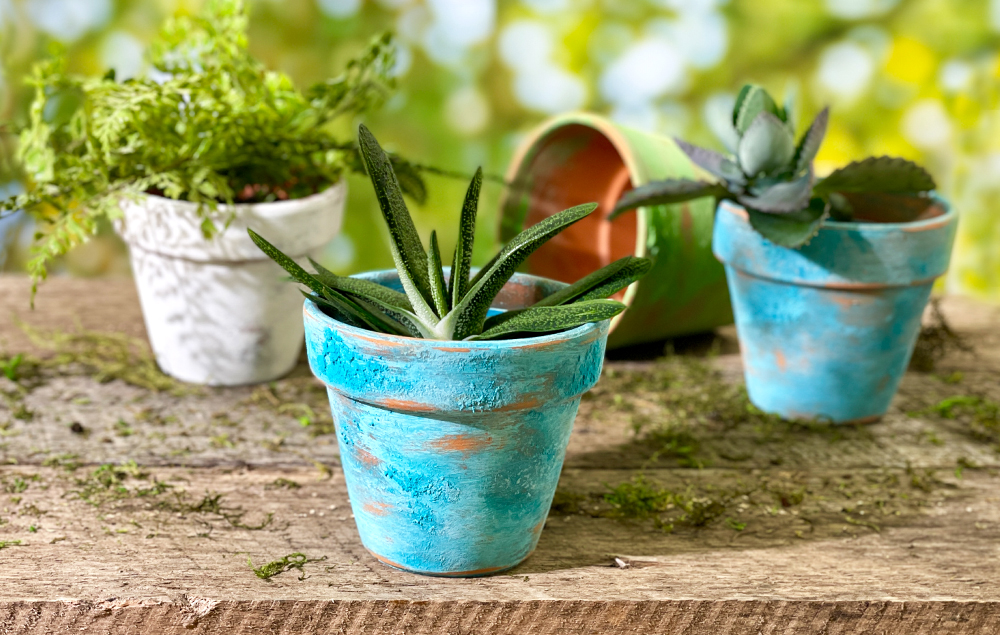
You won’t have to wait months or years to get the beautiful weathered look of a time-worn pot. Give new clay pots a vintage aesthetic in minutes using paint and a few simple steps...
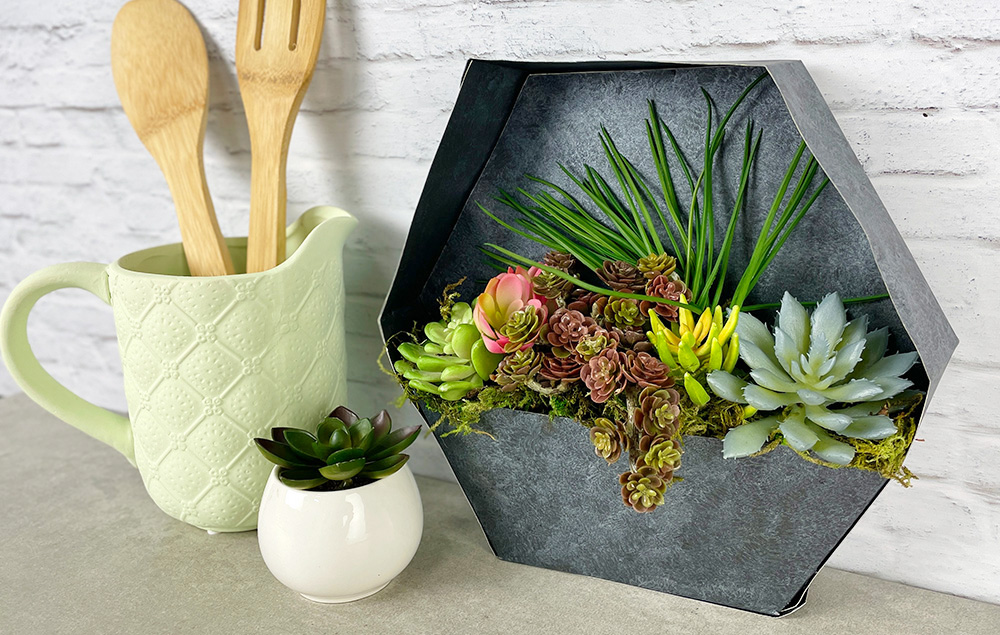
Create a chic succulent planter with a modern twist! Black poster board with a coat of silver metallic paint mimics the look of galvanized metal. This stylish DIY project is perfect for adding a touch of industrial elegance to any space...