Halloween Bean Art

Halloween Bean Art
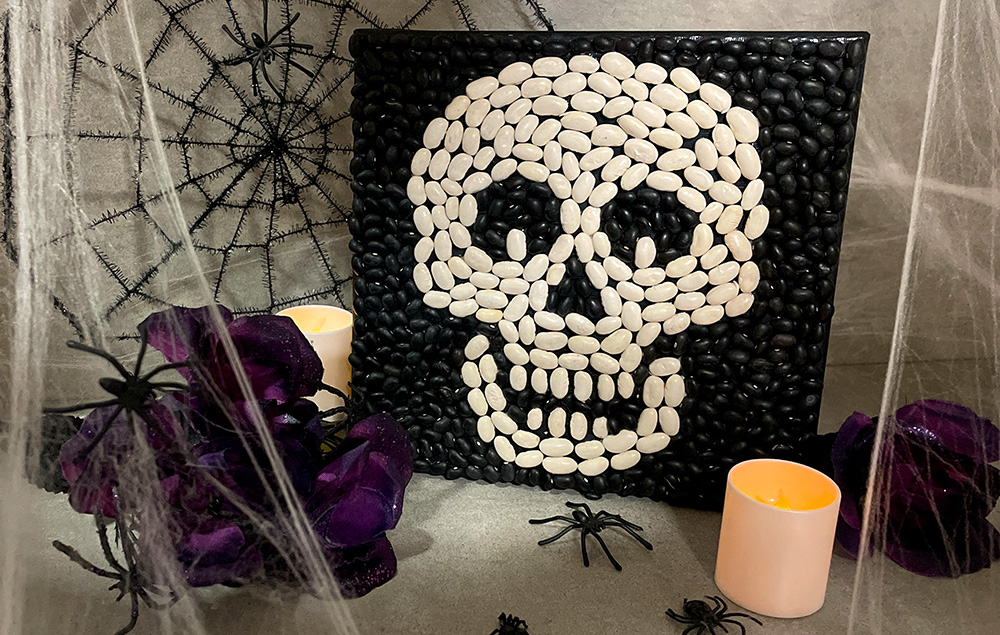
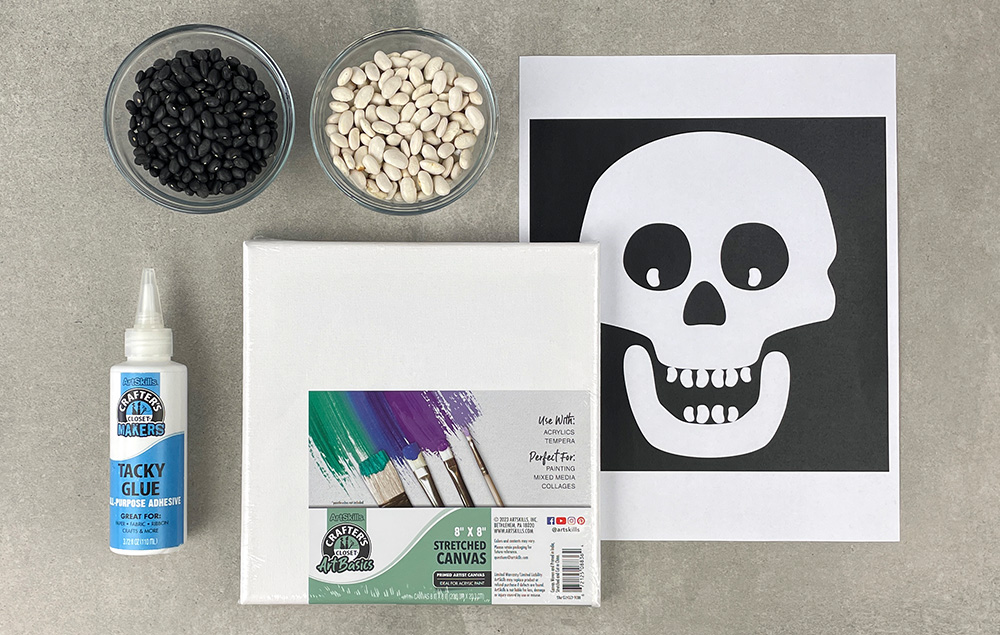
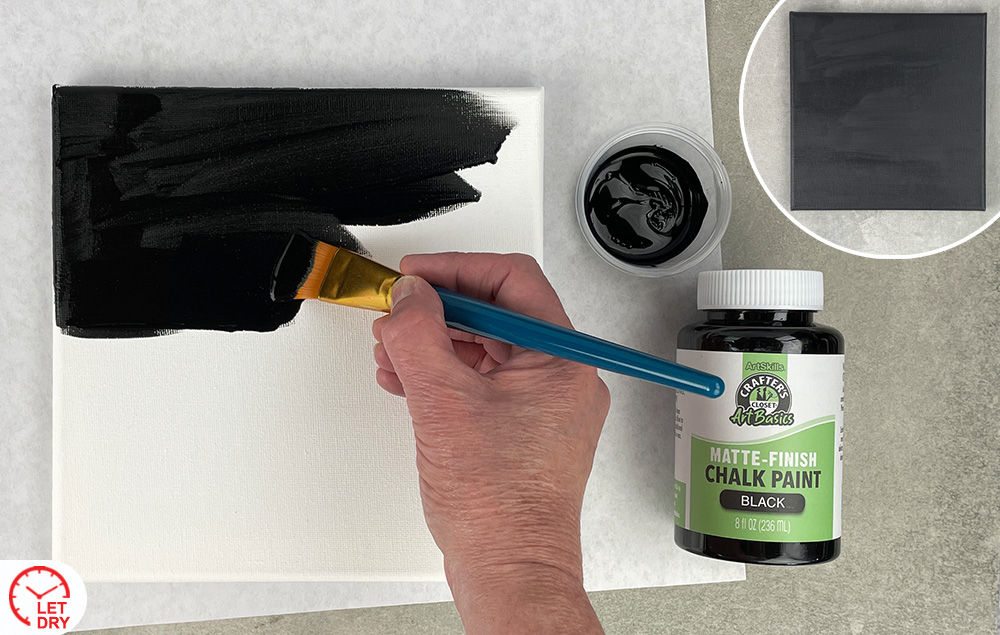
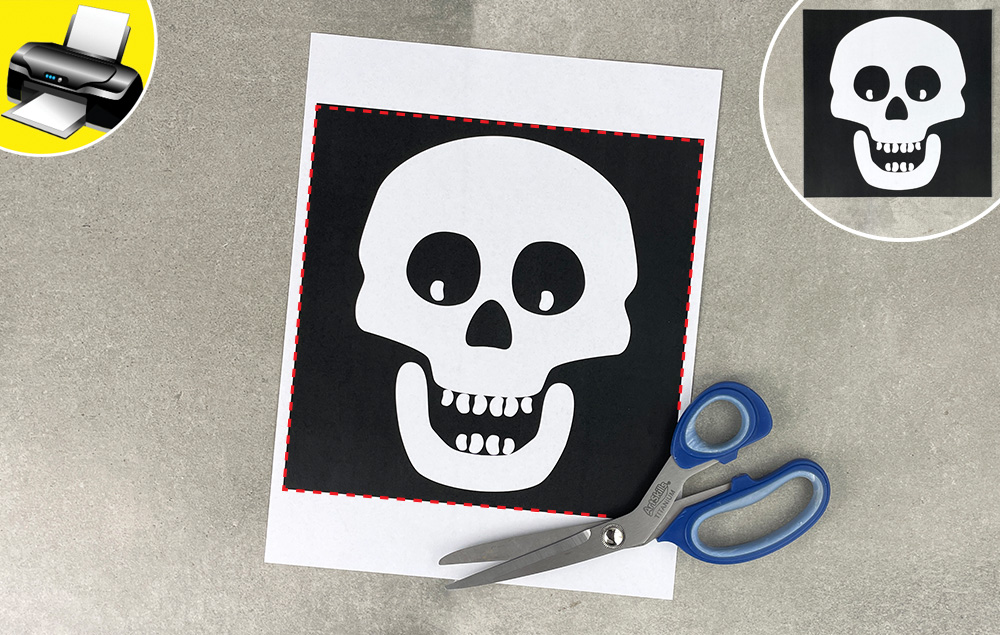
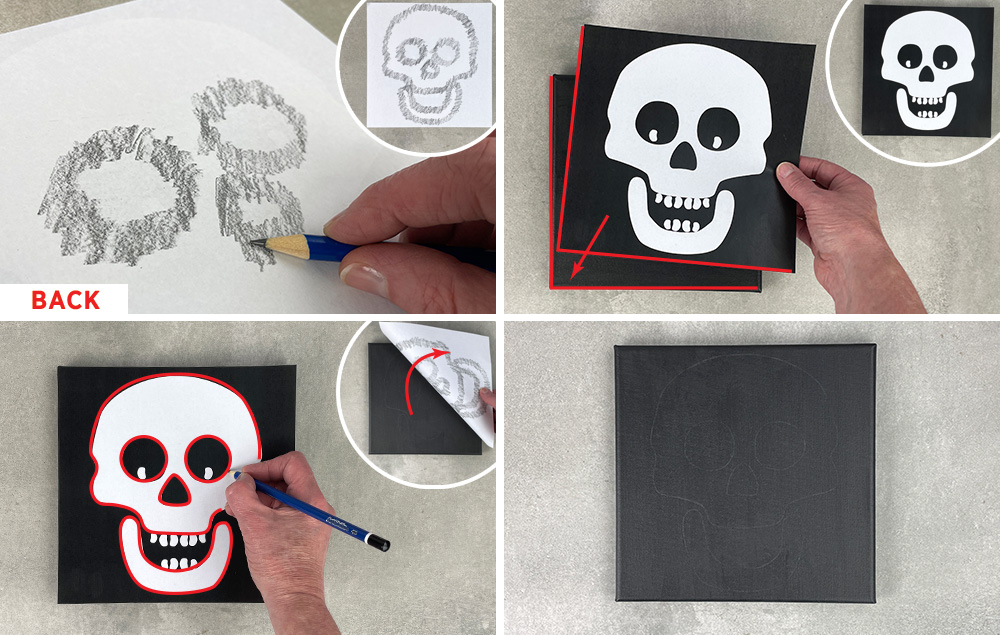
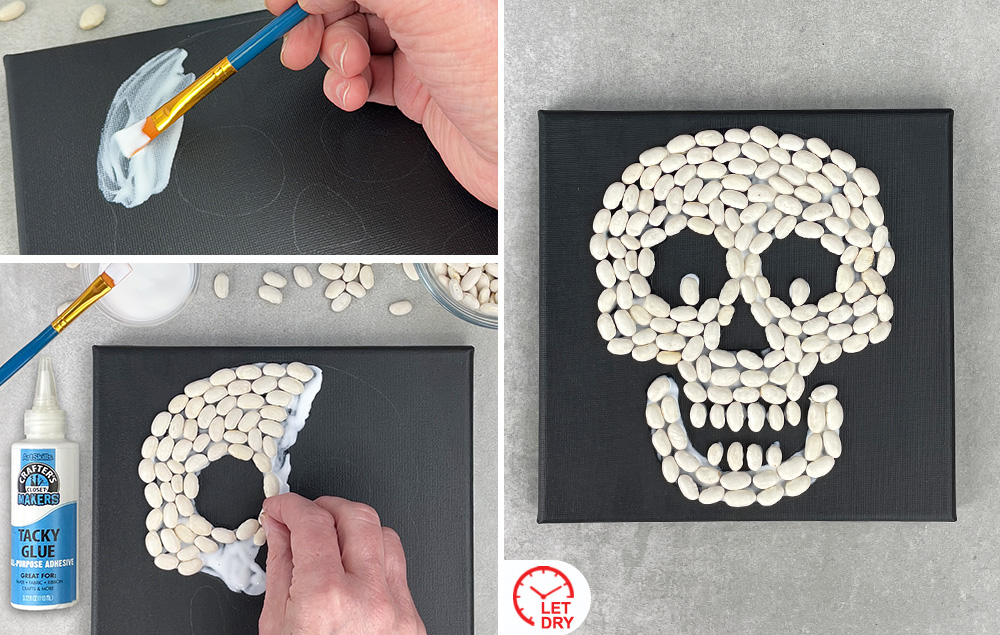
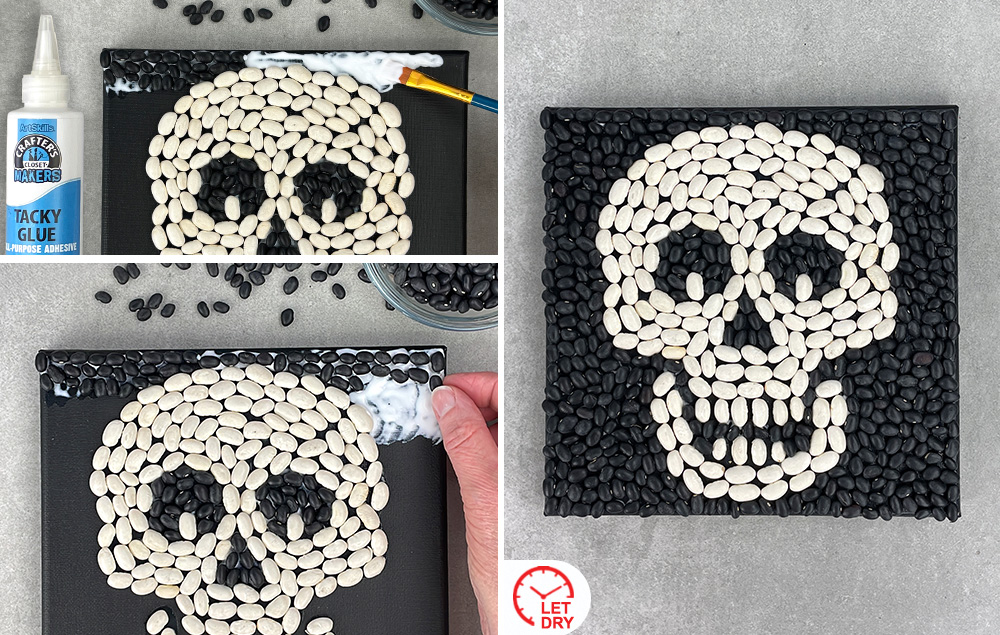
Create a striking Halloween decoration by gluing white and black dried beans onto a black-painted canvas to form a detailed skull design. The contrasting colors of the beans against the dark background make for a visually captivating and spooky piece perfect for Halloween decor.

Let's Get Started

STEP 1:

A)    Paint the canvas black. Let dry.

STEP 2:

A)    Print out the template. Cut the template to the edge of the black square.

STEP 3:

A)    Flip the template over to the back and rub a graphite pencil over the edges of the skull.

B)    Turn the template back over to the front and place it on top of the canvas so the edges of both line up.

C)   Trace the outline of the skull. The graphite from the pencil will transfer to the canvas.

D)   Remove the paper template to reveal the transferred pencil template.

STEP 4:

A)    Fill in the skull area with tacky glue, working in small areas. Add the dried white beans to the wet tacky glue.

B)    Complete filling the skull area with dried white beans.

C)   Remember to use the beans to add the eye highlights and teeth. Let dry.

STEP 5:

A)    Fill in the background area with tacky glue, working in small areas. Add the dried black beans to the wet tacky glue.

B)    Complete filling the background with dried black beans.

C)   Remember to fill in the eyes and nose with the beans. Let dry.

Related Posts
This inexpensive craft is eerily fun to make! These spooky candles are made with recycled paper tubes and hot glue. Creating dramatic Halloween decor has never been so simple...
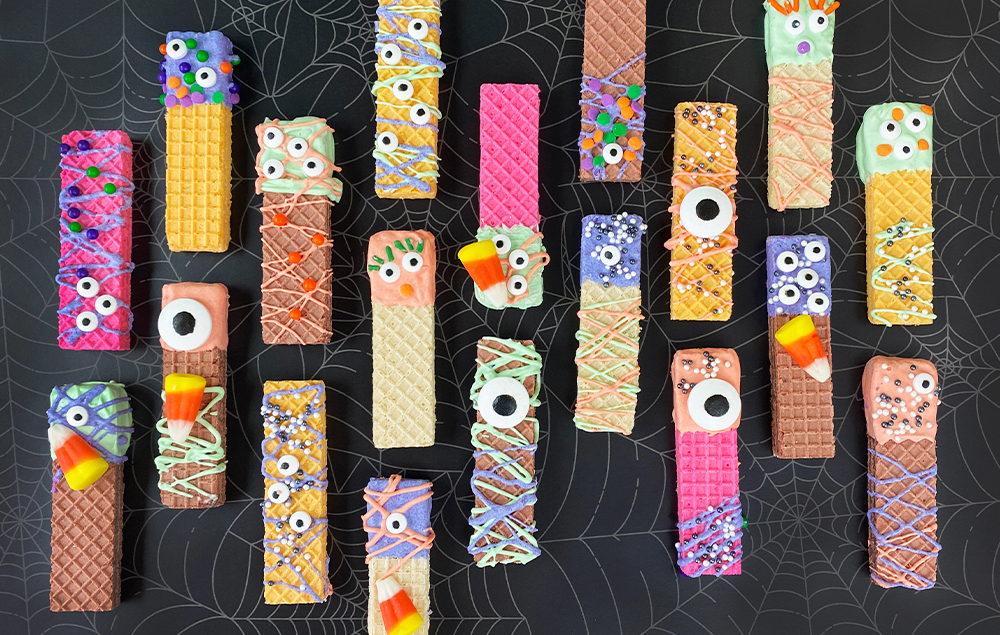
These delightful sugar wafer treats are brought to life with spooky sprinkles, creepy candy eyes, and drizzled chocolate in fun Halloween colors, making each bite a playful adventure...
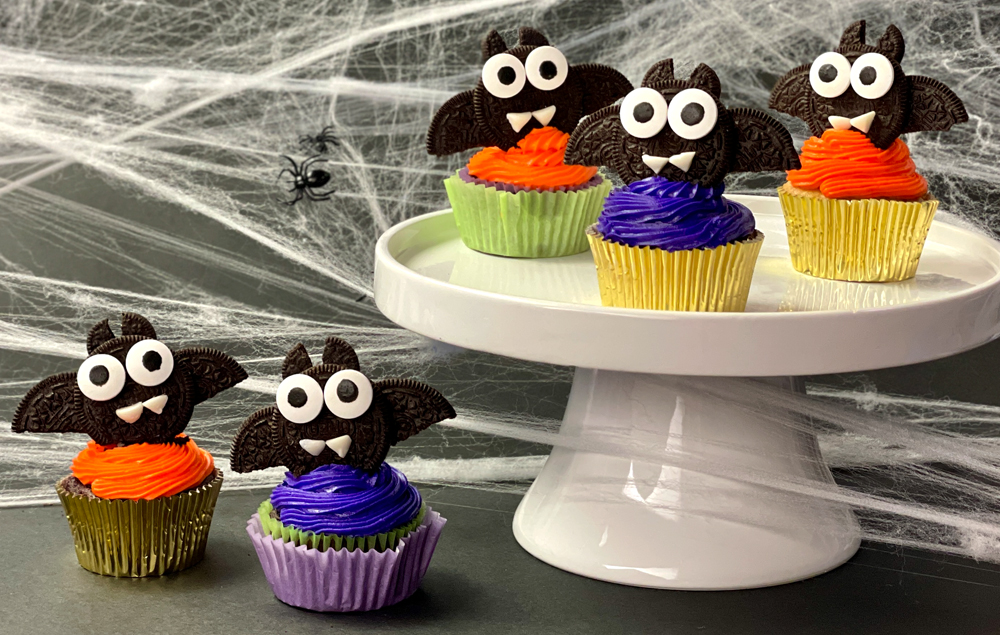
These Halloween treats feature colorful cupcakes topped with spooky edible bats. Use store-bought cake mix to make this a frighteningly easy dessert...