Haunted House
What You'll Need:
- Empty Milk Carton
- Crafter’s Closet Matte-Finish Black Chalk Paint
- Crafter’s Closet Project Knife Set
- Crafter’s Closet Fabric Scissors
- Crafter’s Closet Hot Glue Gun
- Crafter’s Closet Hot Glue Sticks
- Crafter’s Closet Multi Colored Cardstock
- Crafter’s Closet Premium Paint Brush Set
- ArtSkills Paint Markers
-
Battery-Operated Tea Light
-
Pencil
-
Scrap of Cardboard
-
Wire
-
Wire Cutters
-
Template


Let's Get Started
STEP 1:
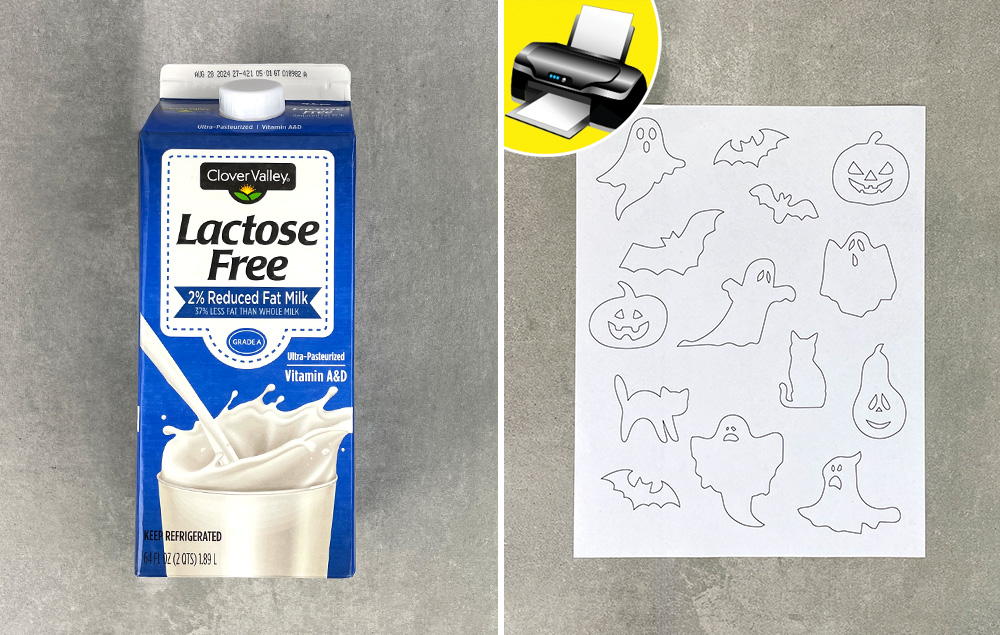
A) Rinse out and clean a carton. Let dry.
B) Print out the template. Set aside for a later step.

STEP 2:
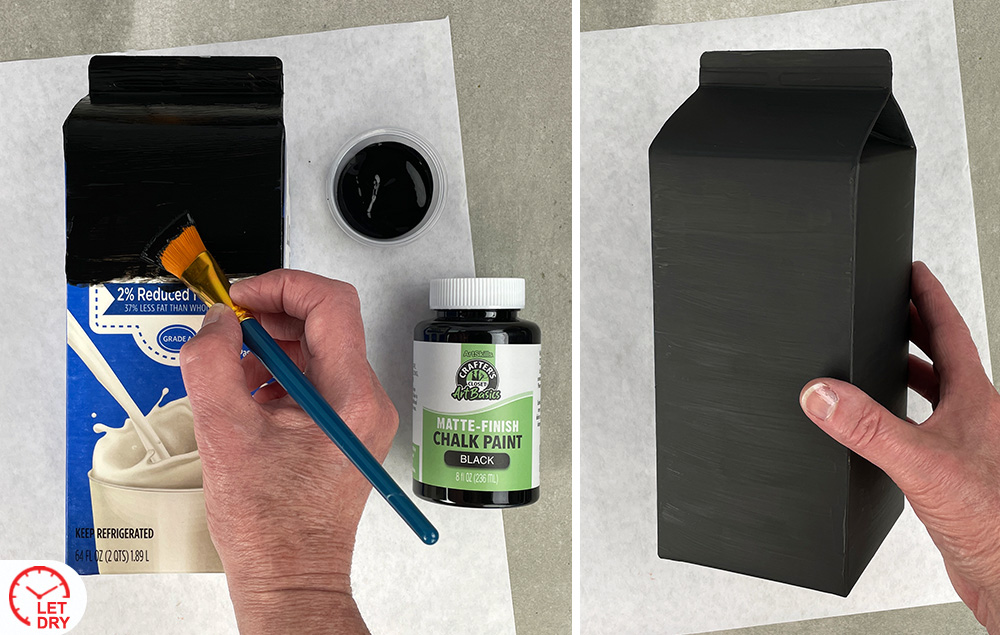
A) Paint the carton with black chalk paint. It may take several coats. Let dry in between each coat.

STEP 3:
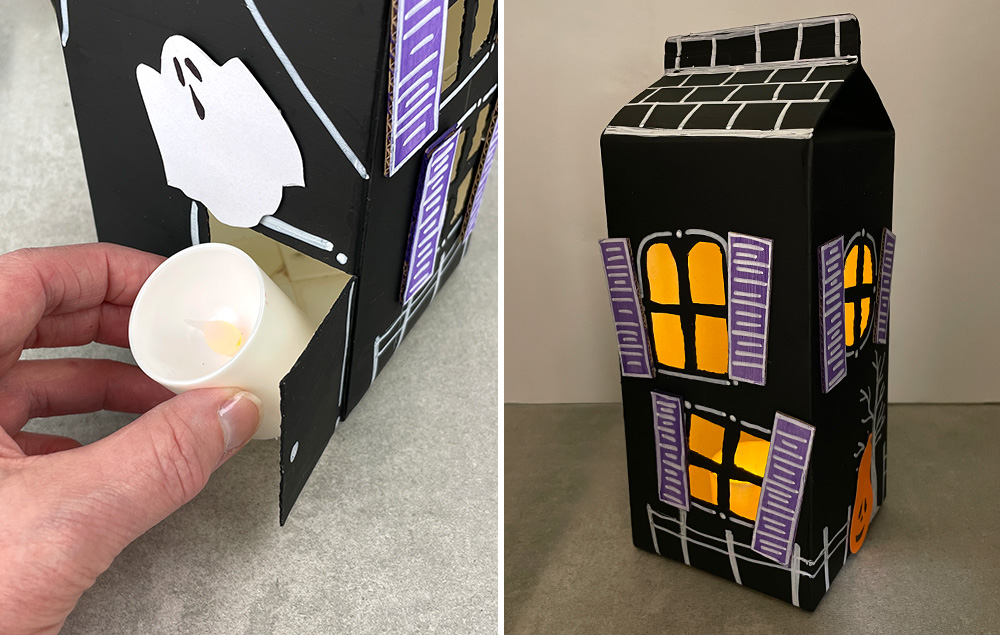
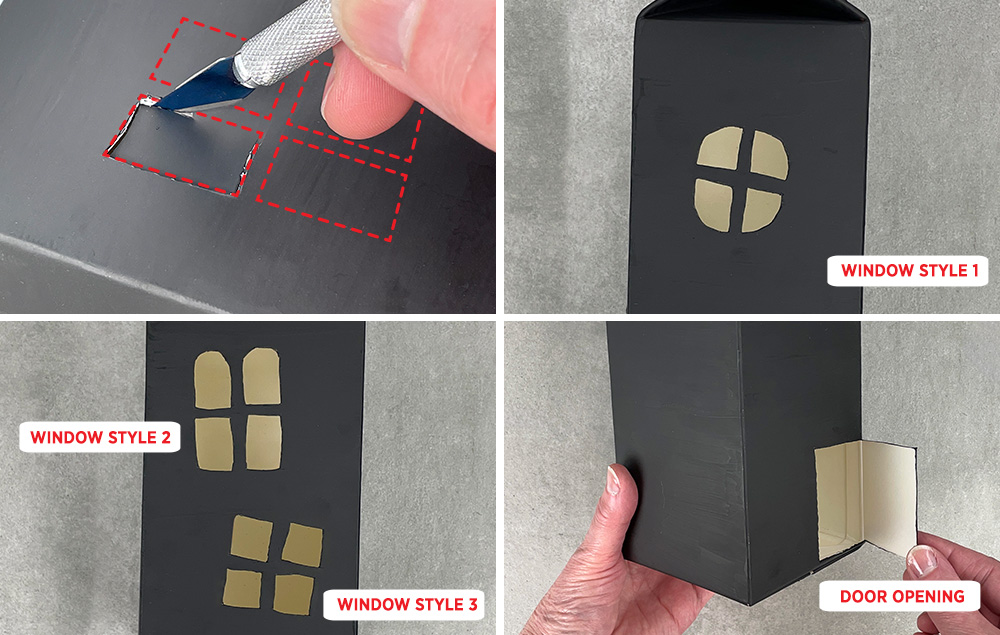
A) Cut out windows and doors using a craft knife. Use your creativity to design your openings, or follow our suggestions for window designs. Note: If you plan to add a tea light to your haunted house, be sure to make a door opening wide enough to fit the candle.

STEP 4:
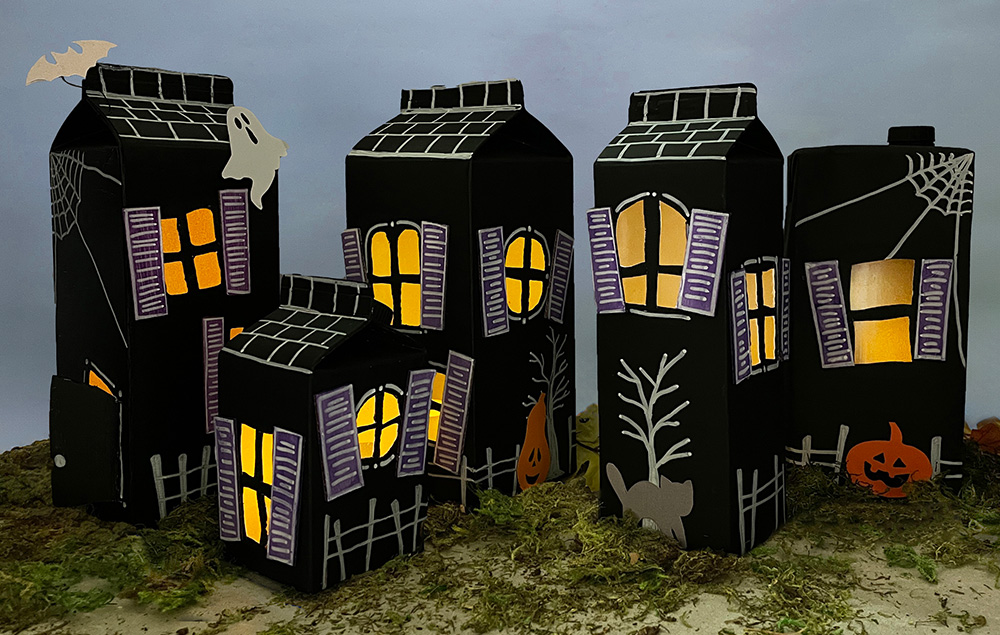
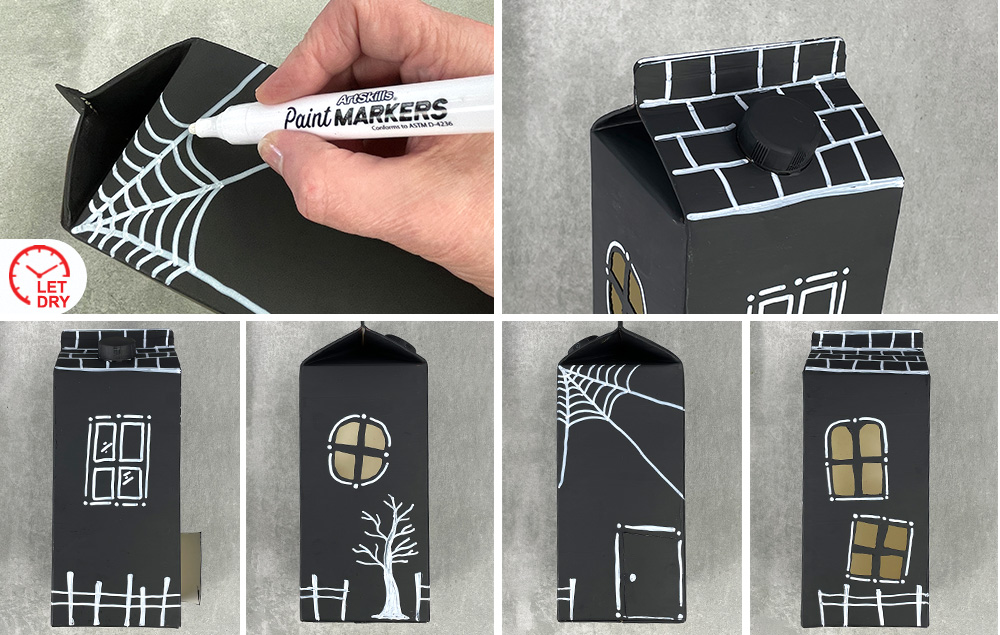
A) Add details to the house using a white paint marker. Have fun personalizing your haunted house! Some suggestions are shown, such as a spiderweb, roof tiles, uncut windows, a tree, a fence, and decorative accents around windows and doors.

STEP 5:
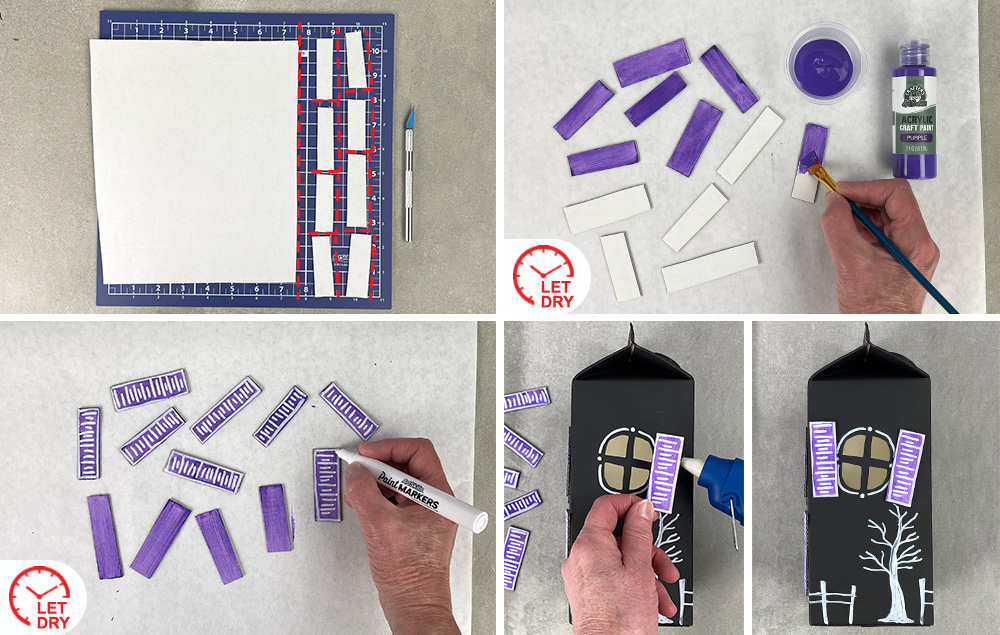
A) Use a scrap of cardboard to make shutters for the windows. Cut out pieces for both sides of each window. Note: The shutters do not have to be precise. The unevenness adds to the charm.
B) Paint the shutter pieces and let them dry.
C) Use a paint marker to add outlines and line details to the shutters. Let dry.
D) Adhere the shutters to the haunted house using the hot glue gun.

STEP 6:
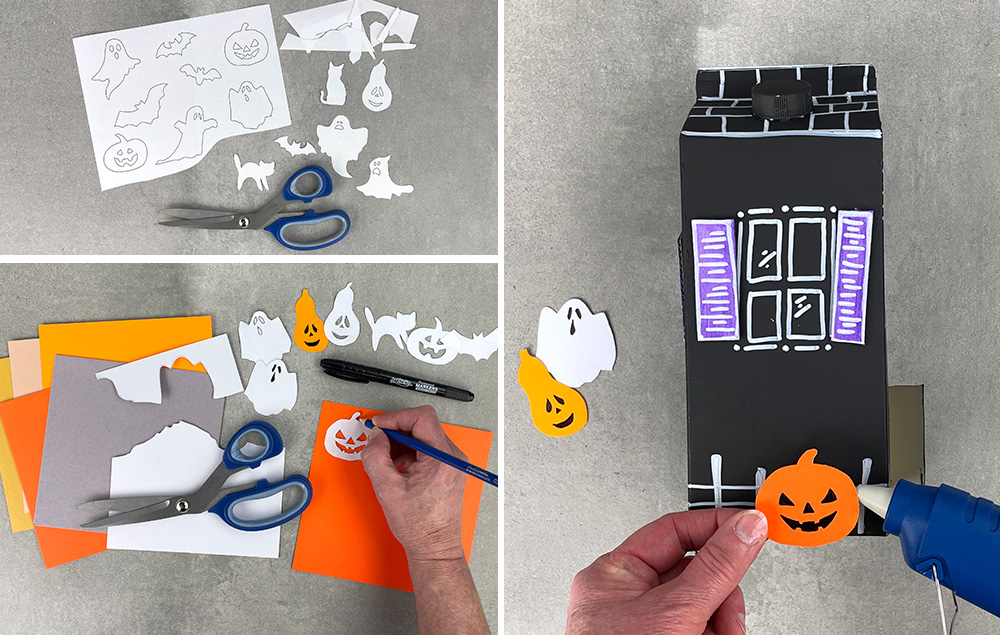
A) Cut out any templates that you would like to use to make accessories for your haunted house.
B) Use the templates by tracing them on cardstock and then cutting out the cardstock shape. Tip: Add details with markers, if desired.
C) Attach the cardstock accessories using the hot glue gun. Tip: For a fun accent, use wire to make a bat “fly” above the house. Simply poke a hole through the roof to anchor the wire, and then sandwich the other end of the wire between two bat cutouts.

STEP 7:
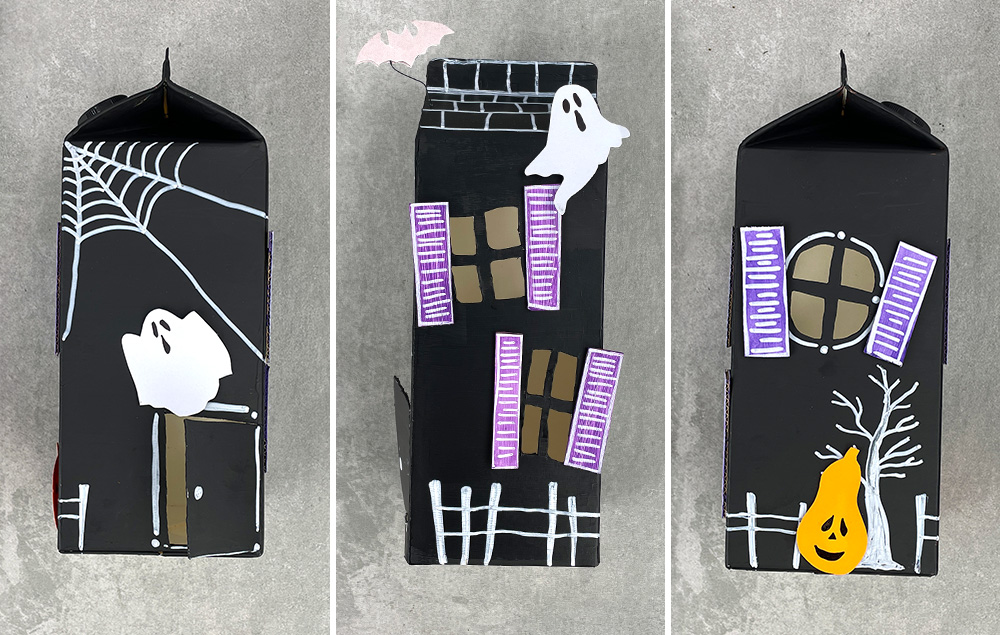
A) Some decorating ideas are shown for inspiration.

STEP 8:
A) Add a battery-operated tea light to the haunted house as a finishing touch.
