Tin Can Pocket Planter
What You'll Need:
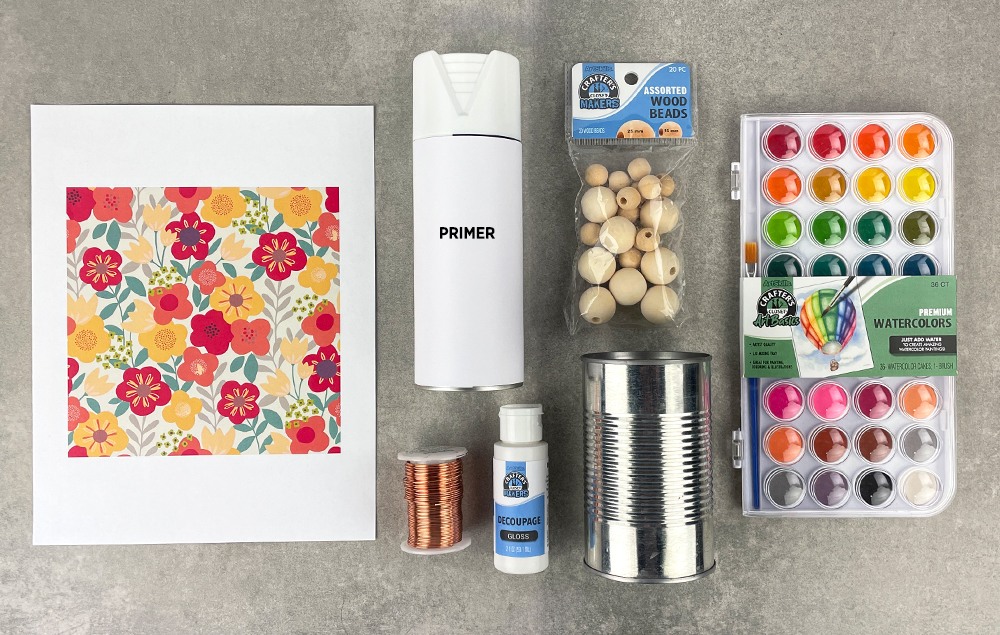
- Tin Can
- Primer
- Crafter’s Closet Decoupage, Gloss
- Crafter’s Closet Unfinished Wood Beads
- Wire
- Crafter’s Closet Premium Watercolors
- Crafter’s Closet Variety Paint Brushes
- Crafter’s Closet Fabric Scissors
- Sandpaper
- Hammer
- Drill
- Template

Let's Get Started
STEP 1:
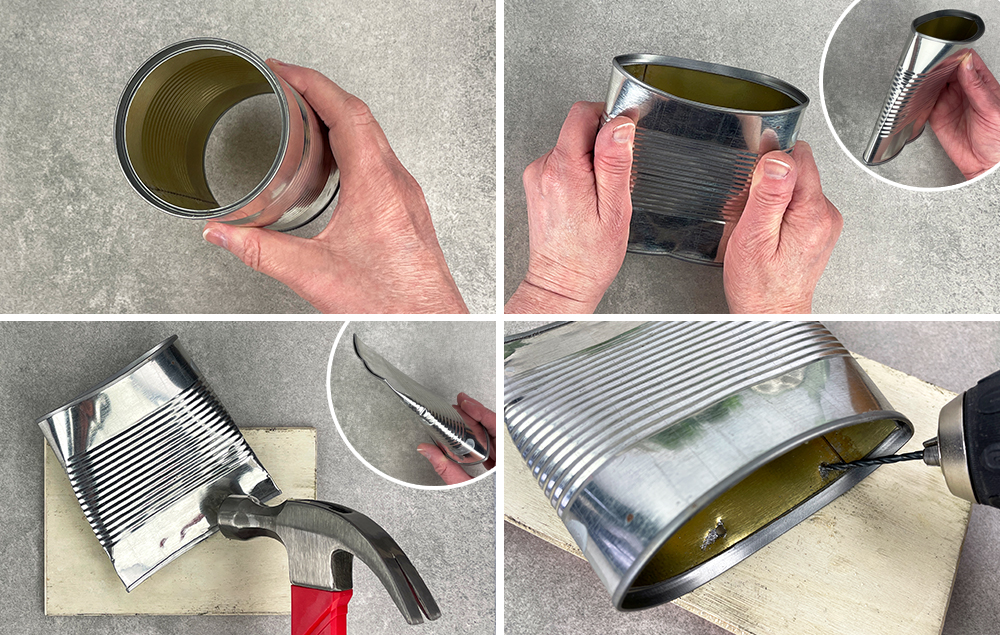
A) Make sure both ends of the can are removed.
B) Squeeze the can into an oval shape.
C) Use a hammer to totally flatten one end of the can. Tip: Work on a protected surface.
D) Use a drill to make two holes in the back of the can for the hanger.

STEP 2:
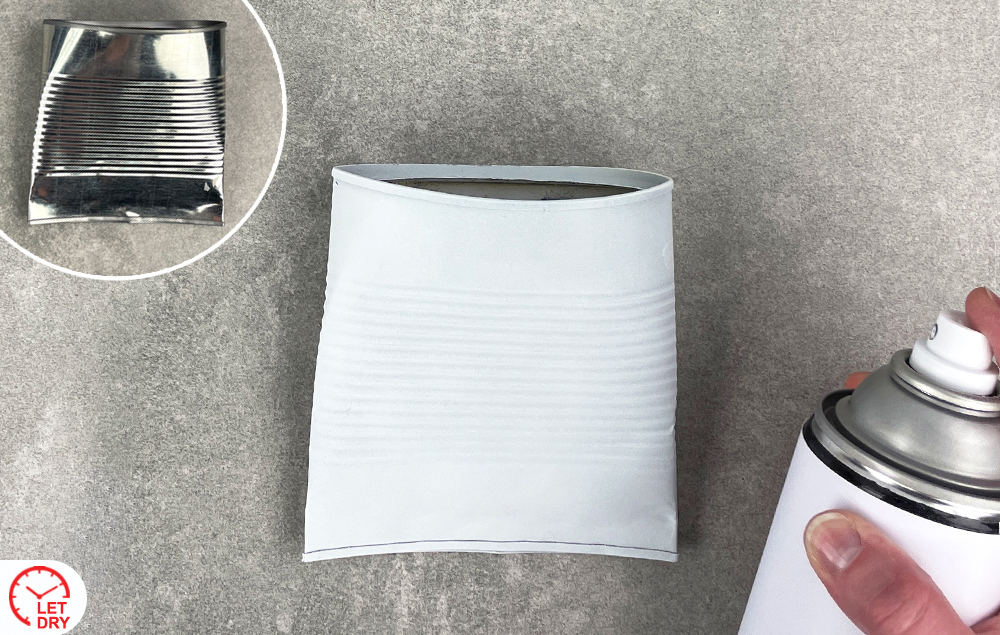
A) Coat the can with primer. Let dry. Note: A primer that prevents rust is ideal.

STEP 3:
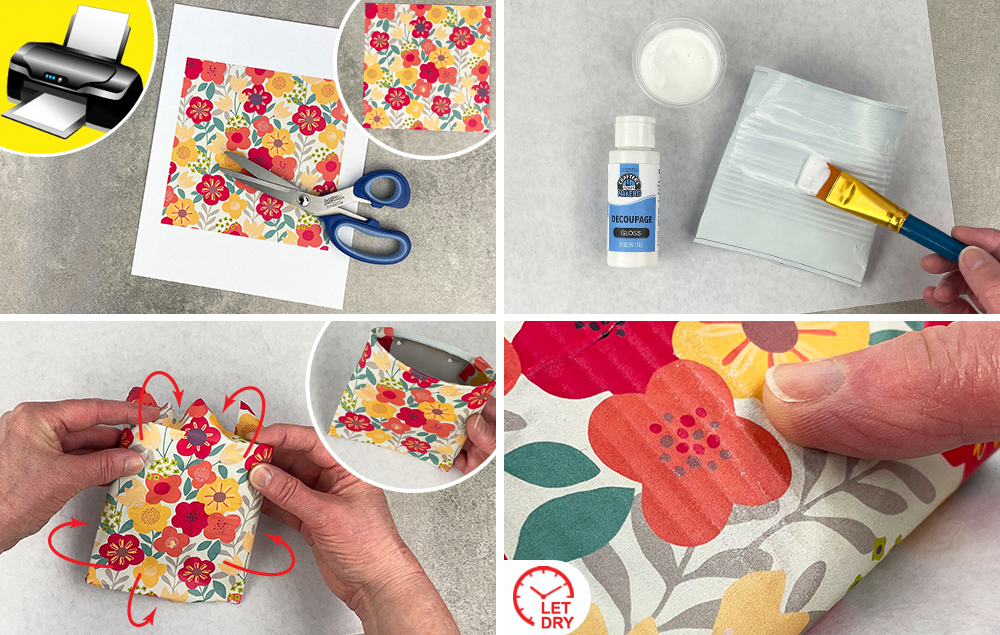
A) Print the template and trim the paper to the edge of the pattern.
B) Apply decoupage medium to the front of the can, as well as around all the side edges.
C) Place the patterned paper over the wet decoupage medium. Wrap the patterned paper around all sides of the can.
D) Press the patterned paper into the grooves of the can to show the texture. Let dry.

STEP 4:
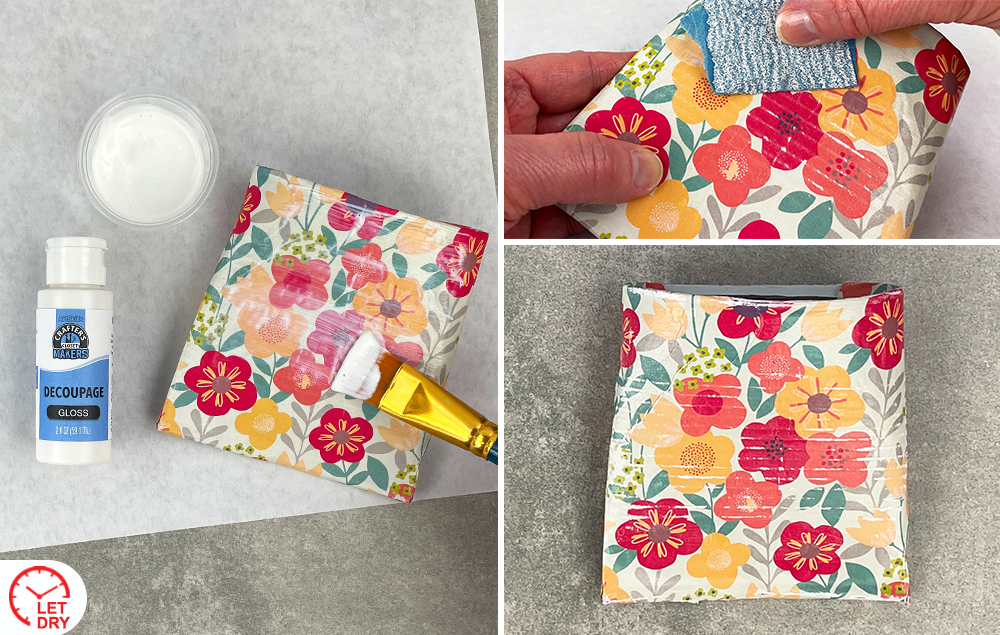
A) Apply a second coat of decoupage medium over the patterned paper to seal the can. Let dry.
B) Lightly sand the can to distress the paper over the grooves.

STEP 5:
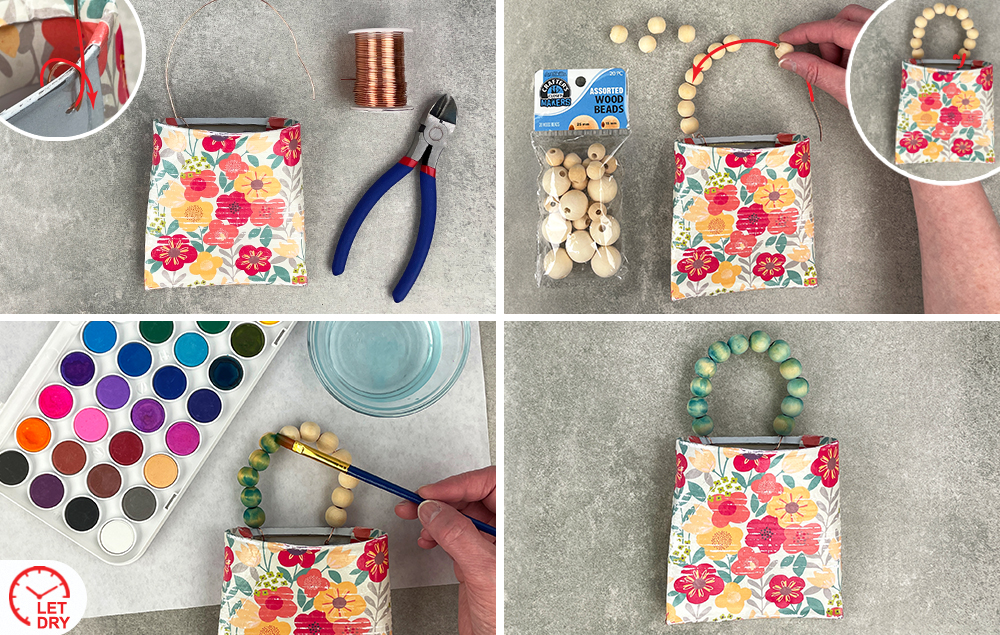
A) Cut a length of wire and insert it into a hole on the back of the can. Twist the wire around the can to secure it in place.
B) Add small wood beads to the wire. Insert the end of the wire into the other hole and twist it around the can to secure it in place.
C) Paint the wood beads with watercolor. Let dry.
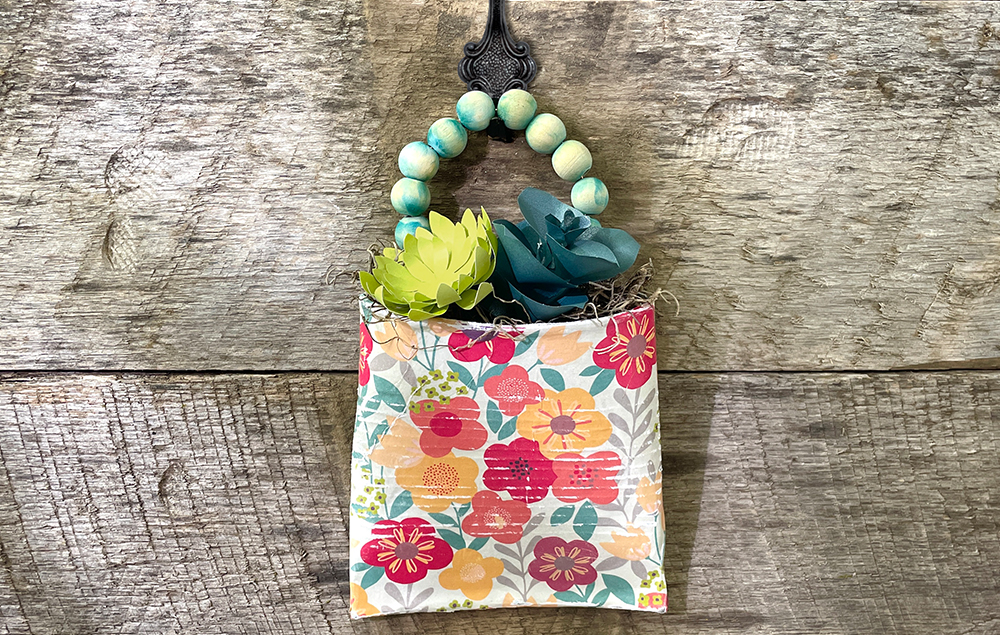
D) The pocket planter is ready to be filled!
