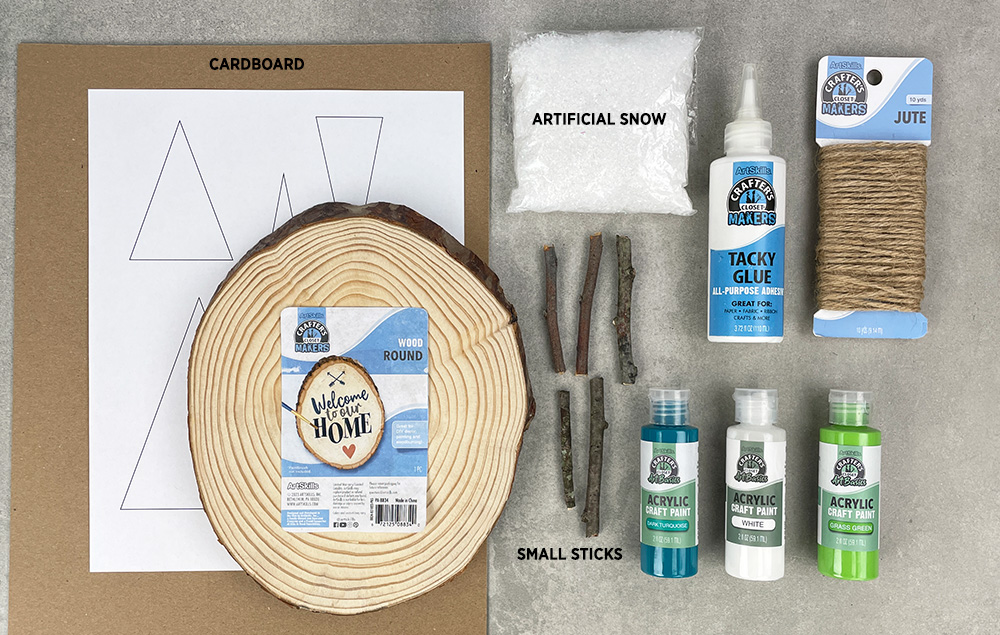
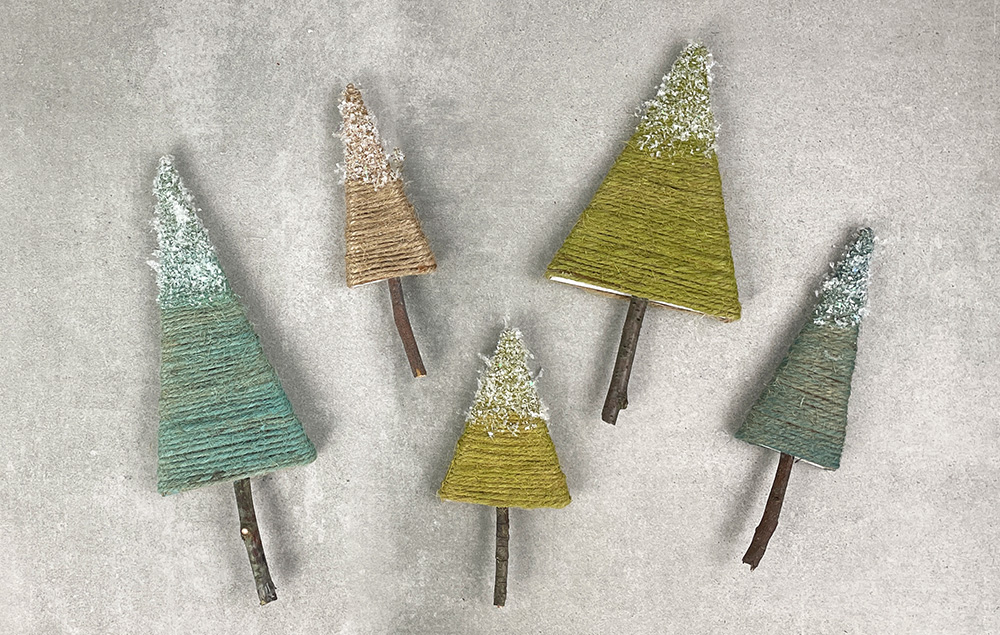
Create a cozy woodland scene with jute-wrapped trees in soft shades of greens, blues, and naturals. Dusted with artificial snow and gathered on a rustic wood slice, this miniature winter forest scene is perfect for seasonal décor.
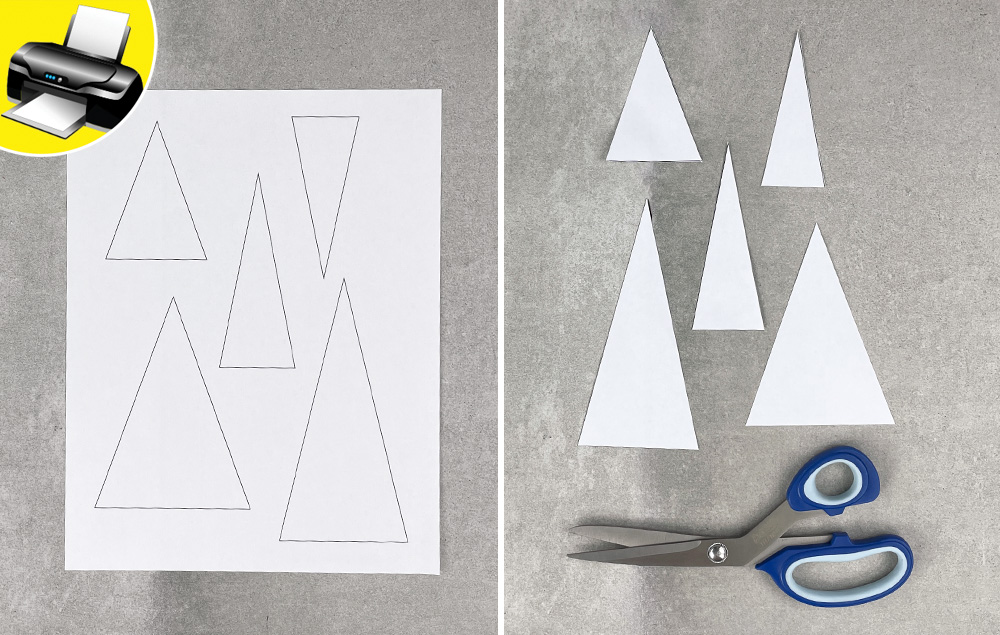
A) Print out the template. B) Cut out the tree shapes from the template.
STEP 2:
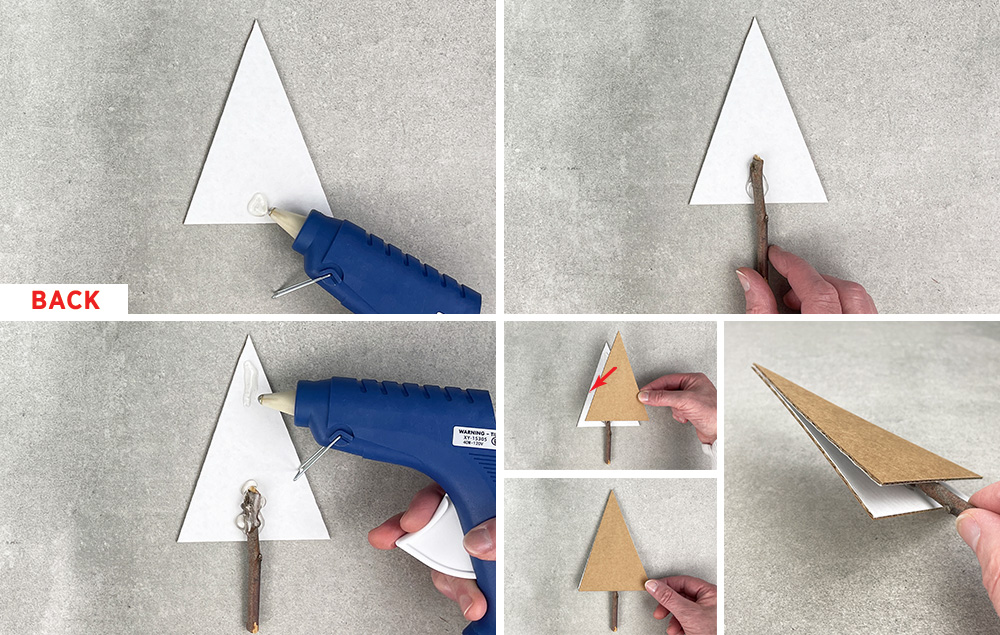
A) Trace the tree template shapes onto cardboard. Note: You will need two cardboard shapes for each paper template shape.
B) Cut out the cardboard tree shapes.
C) You will have two each of 5 different tree shapes..
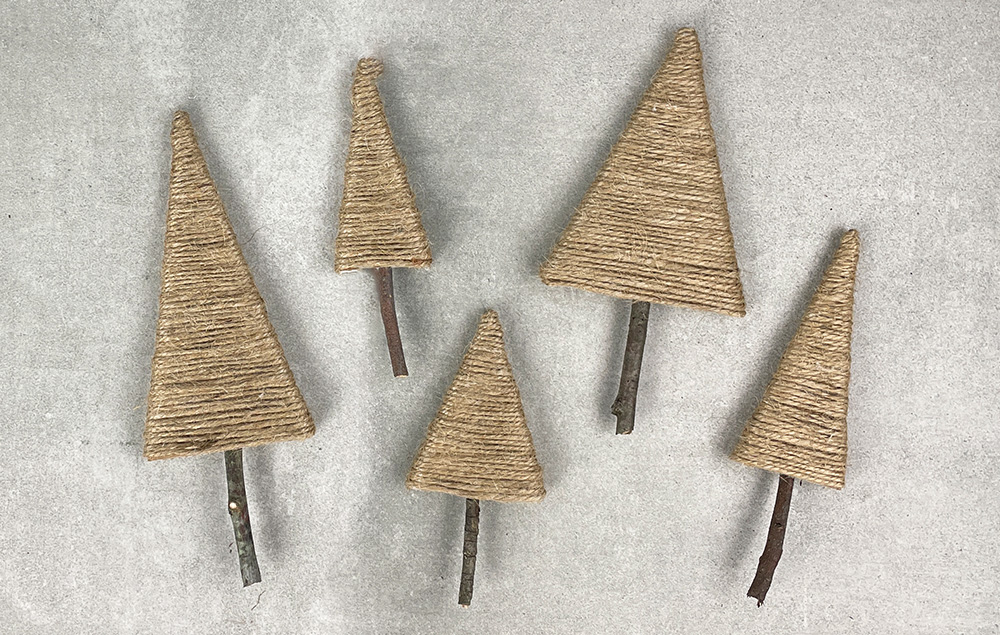
To make a tree:
STEP 3:
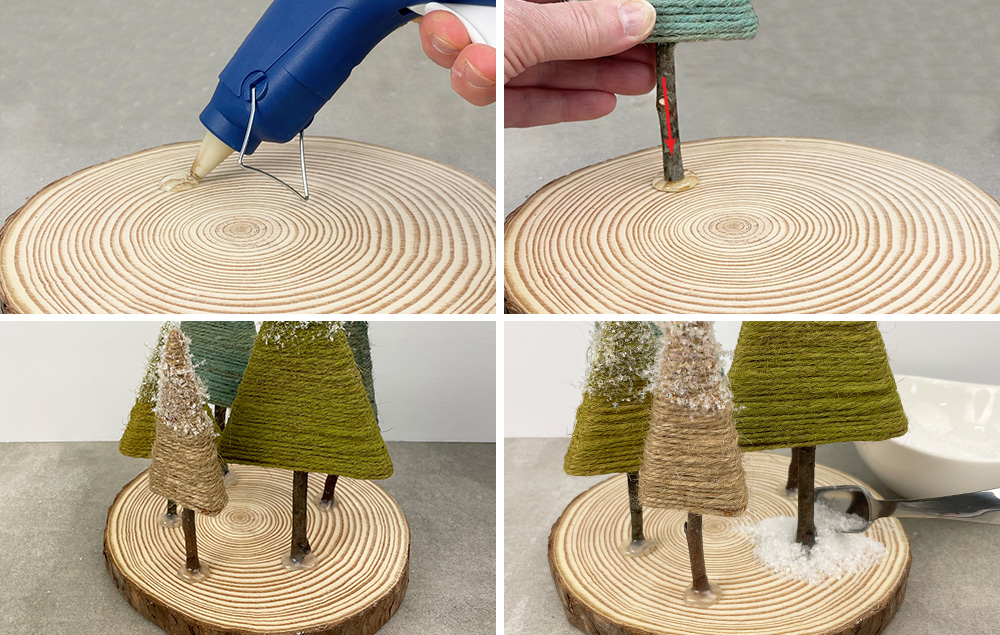
A) Lay a cardboard tree shape on your workspace. Add hot glue to the bottom center of the tree. Note: If your cardboard has a white side, make sure that side is facing up.
B) Lay a stick onto the hot glue to create the tree trunk.
C) Add more hot glue to the top of the stick and at the top of the tree.
D) Press the matching cardboard tree shape onto the glued areas, sandwiching the tree trunk in between, and making sure to match up the sides of the tree.
STEP 4:
A) Repeat this process to make all the cardboard trees.
To wrap a tree:
STEP 5:
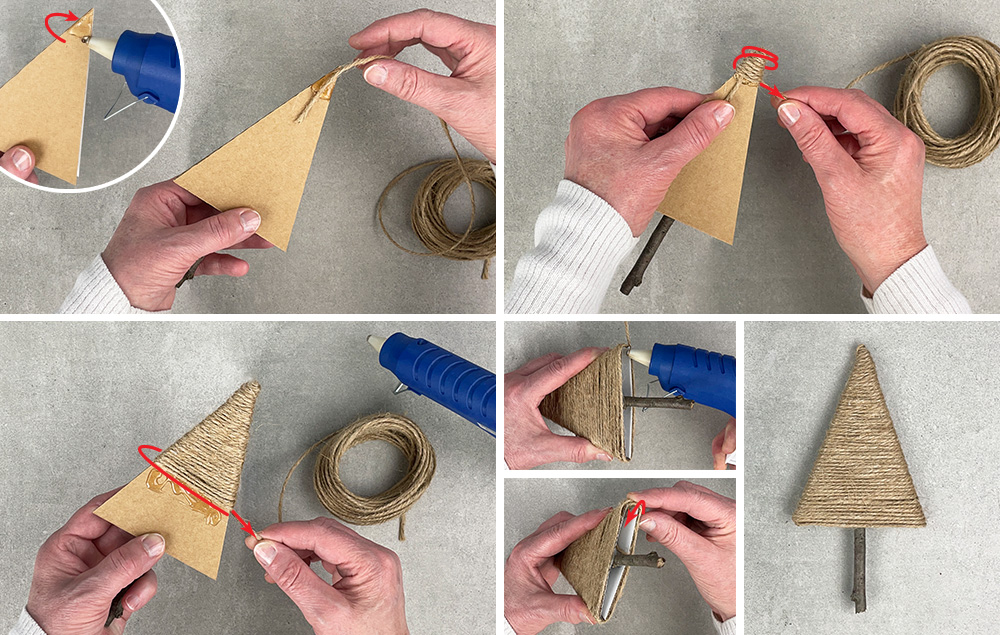
A) Add hot glue around both sides of the top of a tree. Lay the end of the jute in the hot glue for a moment until it grabs.
B) Wind the jute around the top of the tree, using the hot glue to secure it in place.
C) Continue wrapping the jute around the tree, adding hot glue as you wrap to secure the jute in place. Wrap all the way to the bottom edge of the tree.
D) Add hot glue in between the cardboard pieces at the bottom of the tree. Insert the tail end of the jute in between the cardboard pieces and into the hot glue to secure it in place.
STEP 6:
A) Repeat this process to wrap all the cardboard trees.
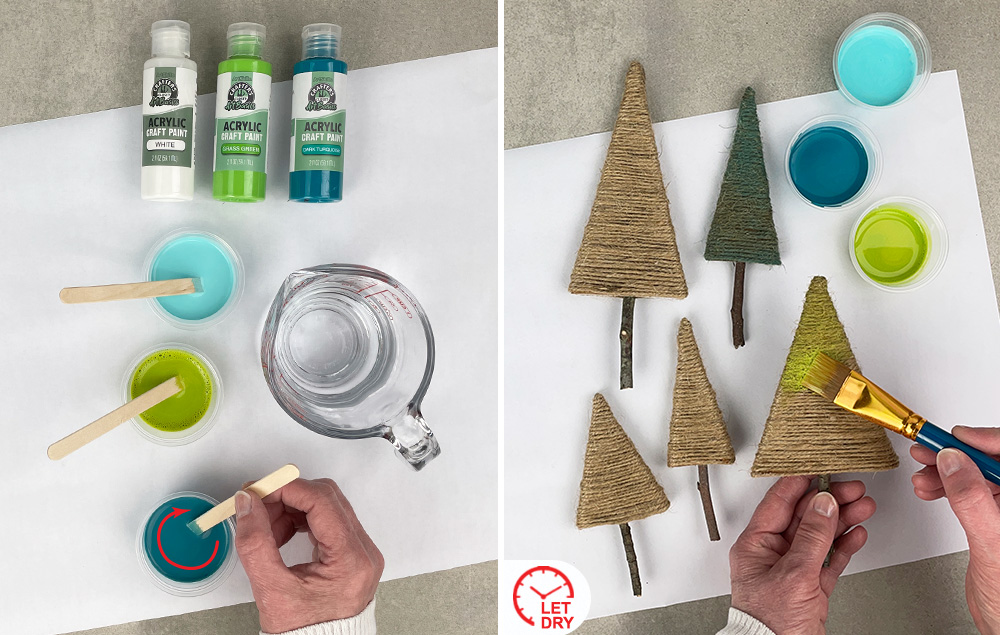
To paint a tree:
STEP 7:
A) Make a paint wash of one part paint to one part water in the colors that you would like to use.
B) Paint a tree with a colored wash. Let dry.
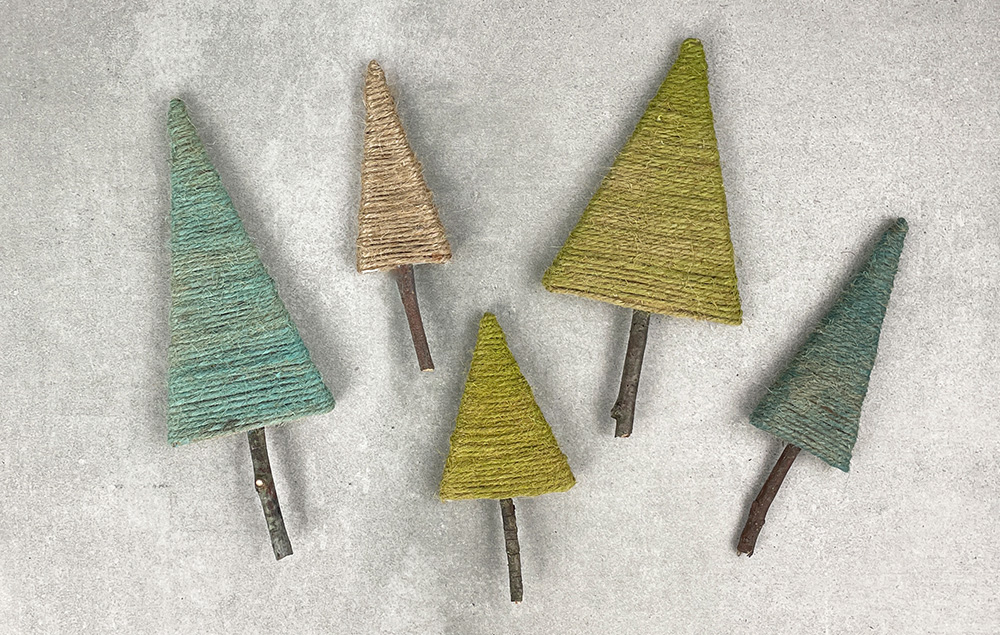
STEP 8:
A) Repeat this process to paint all the trees. TIP: You may want to leave one or two trees unpainted.
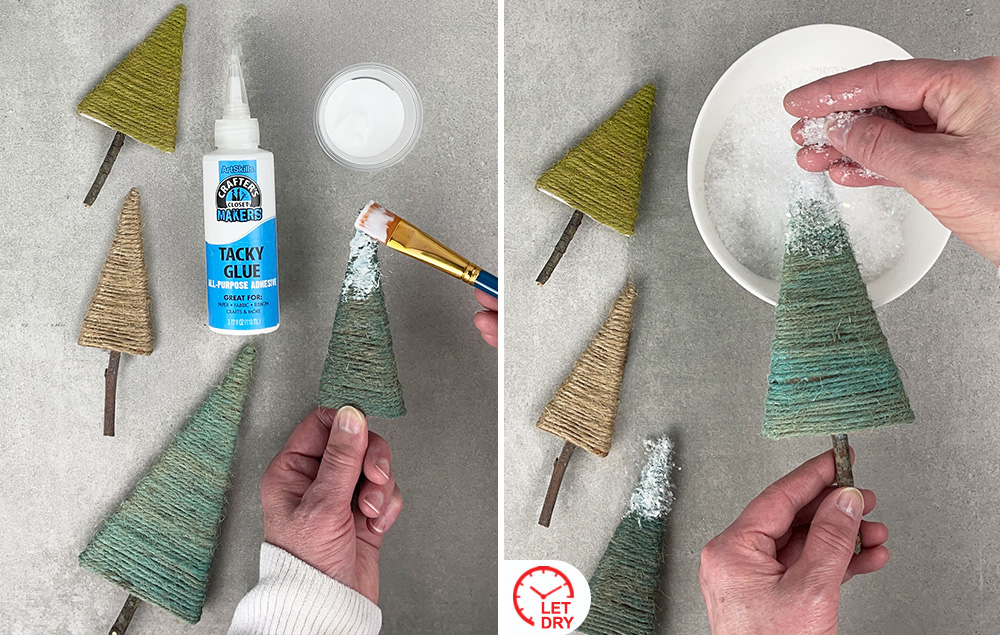
STEP 9:
A) Lightly dab tacky glue on the top of a tree.
B) Sprinkle fake snow onto the wet glue. Let dry.
STEP 10:
A) Repeat this process to add snow to the rest of the trees.
STEP 11:
A) Add an area of hot glue to the wood slice.
B) Press a tree trunk into the hot glue and hold it in place until the glue sets up.
C) Repeat this process with the other trees.
D) Sprinkle artificial snow over the bases of the trees to hide the hot glue.
Transform a simple paper lunch bag into a delightful gingerbread gift bag, complete with sweet decorations and cozy charm! This whimsical craft is a unique way to package your gifts, especially when it’s personalized with your own design...
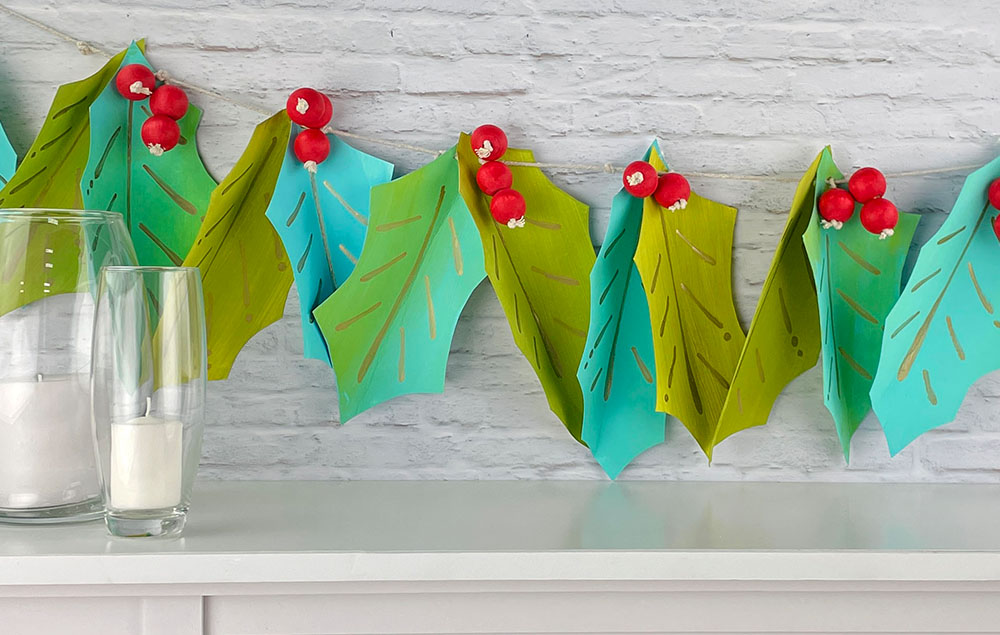
Create a retro-inspired holly garland crafted from oversized poster board leaves. Interspersed with vibrant red wooden beads for berries, this large-scale garland adds a touch of vintage charm to your holiday décor...
Create a cozy winter ambience with this charming Mason jar craft. Use Epsom salt to resemble frost, adorn the jar with winter greenery, and add a tea light to impart a warm, inviting glow...