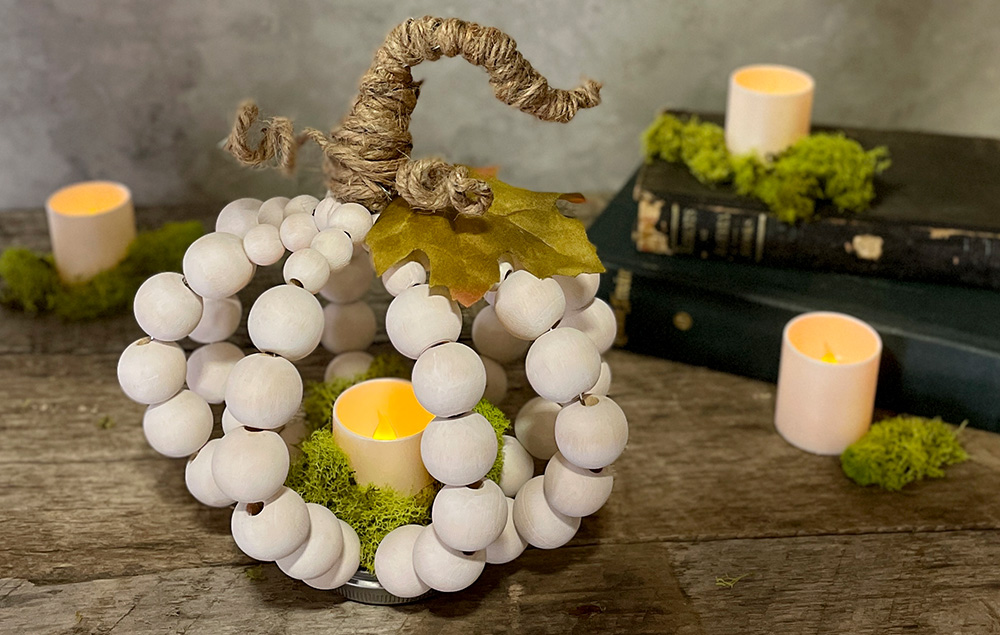
Wood Bead Pumpkin
What You'll Need:
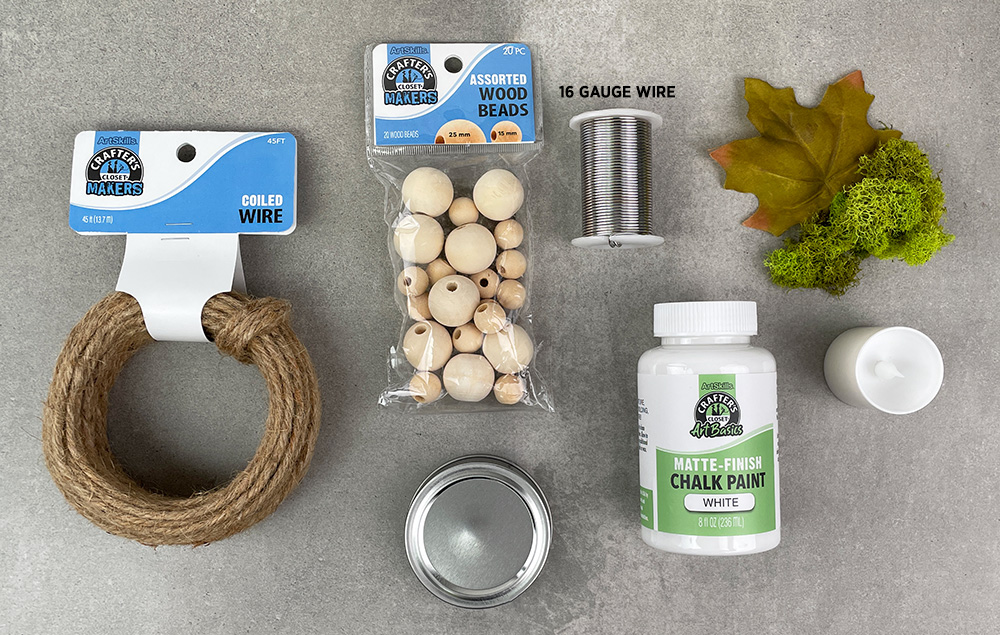
- Crafter’s Closet Unfinished Wood Beads
- Crafter’s Closet Matte-Finish White Chalk Paint
-
Jar Lid
-
16-Gauge Wire
-
Drill
-
Wire Cutters
-
Pliers
- Crafter’s Closet Premium Paint Brush Set
- Coiled Craft Wire
-
Moss
-
Tea Light
-
Leaves
-
Black Marker

Let's Get Started
STEP 1:
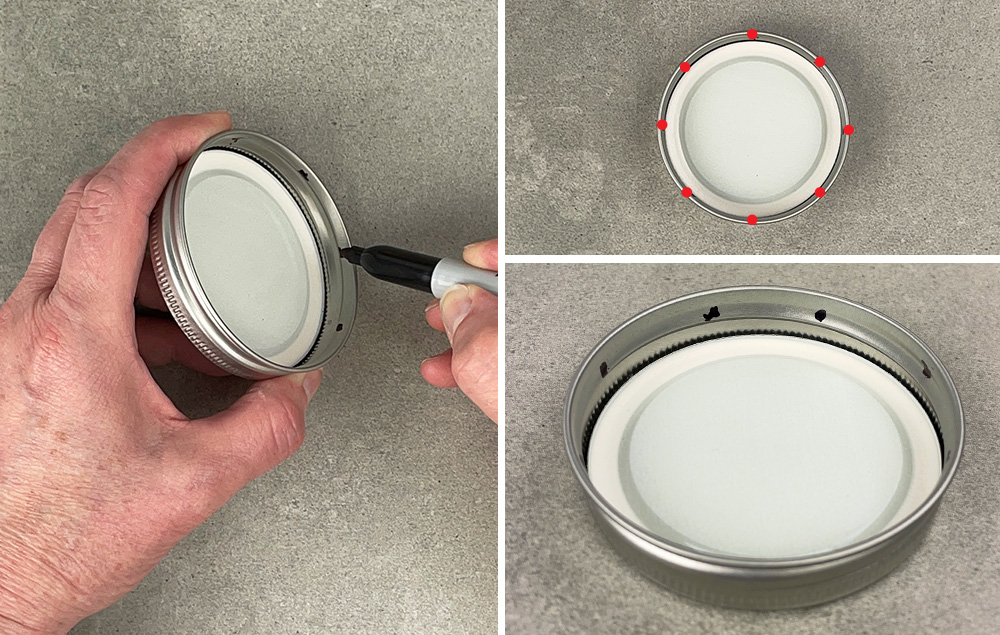
A) Mark out 8 evenly-spaced spots on a jar lid with a black marker.

STEP 2:
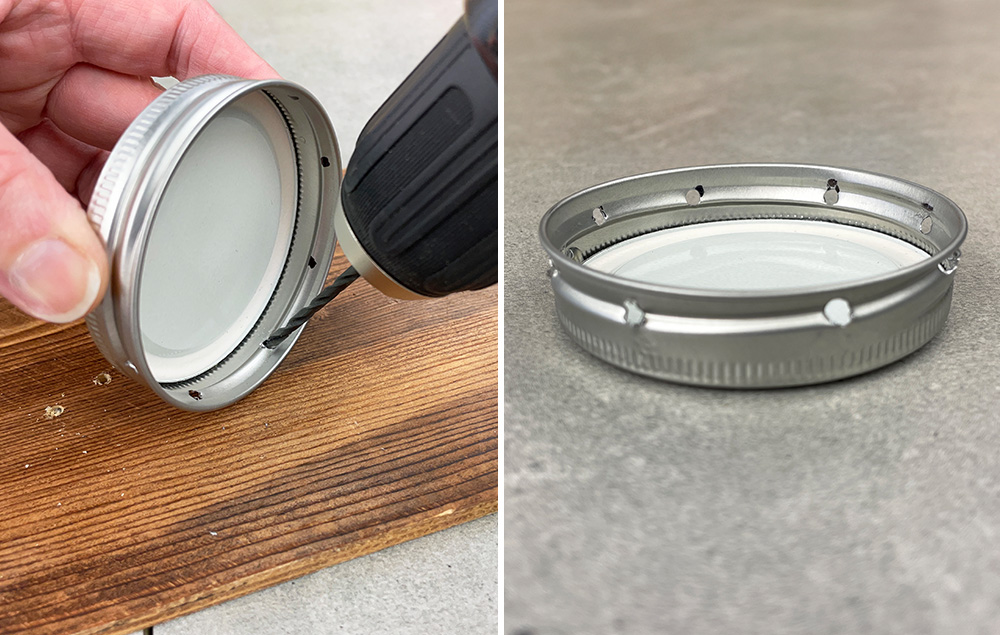
A) Use a drill to make holes where the marks are.

STEP 3:
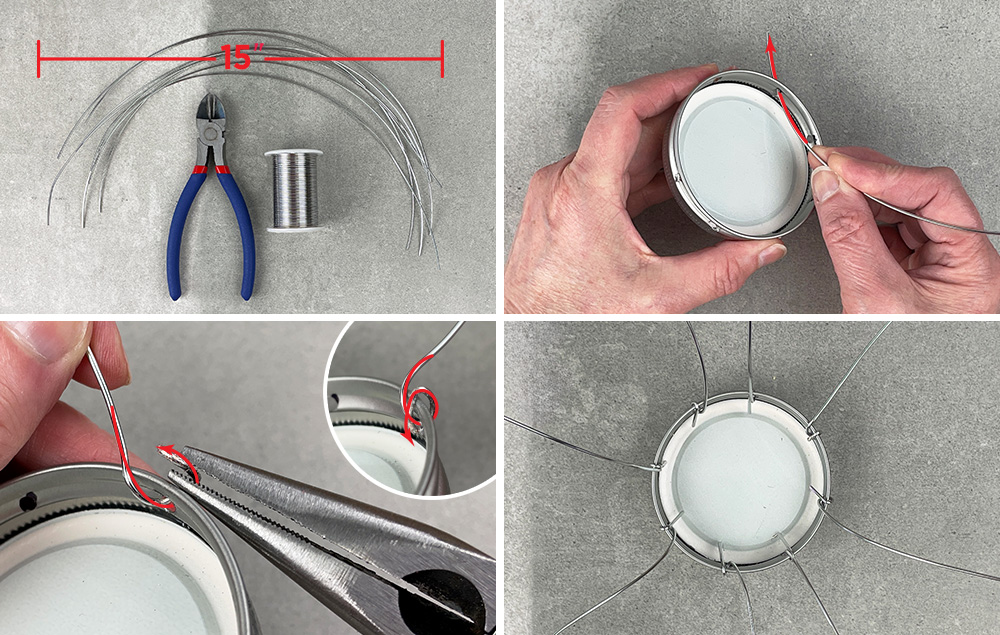
A) Cut 8 15" pieces of 16-gauge wire.
B) Insert a piece of wire through a hole from the inside to the outside.
C) Bend the wire over the rim of the lid to secure it in place.
D) Repeat this process for all the wires.

STEP 4:
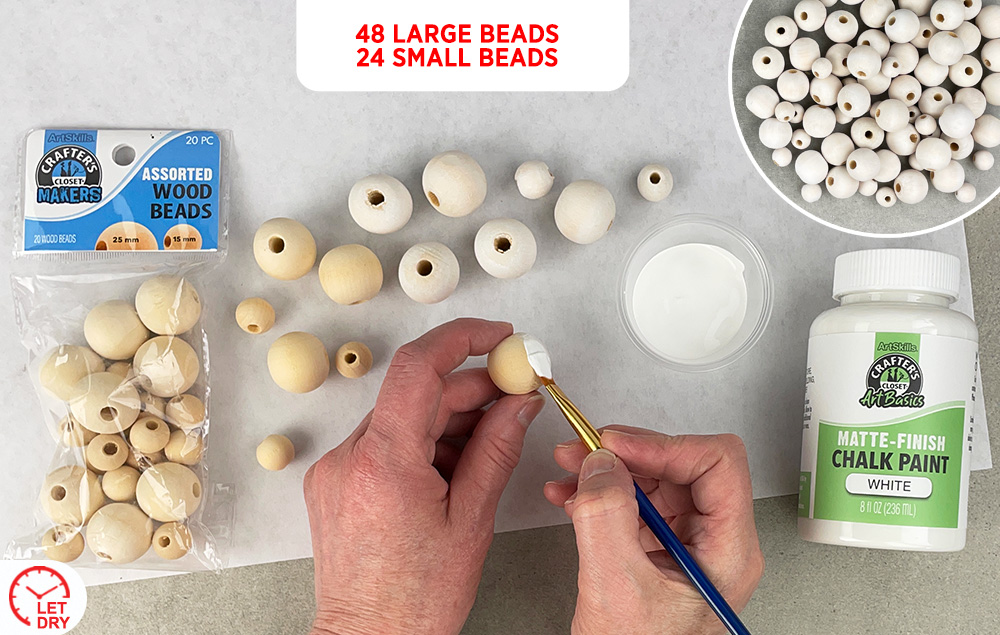
A) Paint the wood beads white. You will need 48 large and 24 small wood beads. Let dry.

STEP 5:
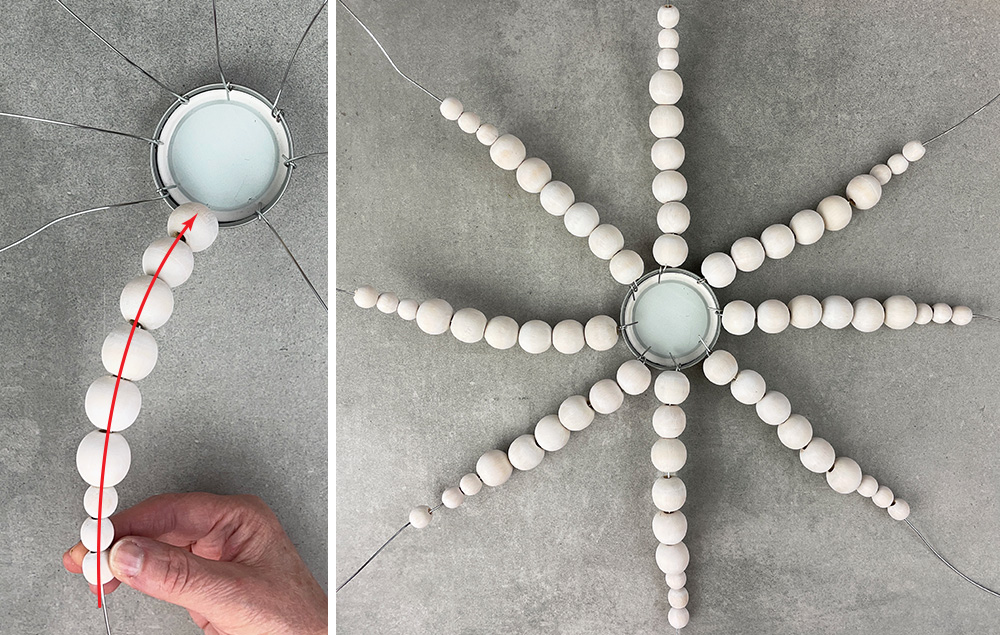
A) Slide 6 large and 3 small wood beads onto a wire.
B) Repeat for all the wires.

STEP 6:
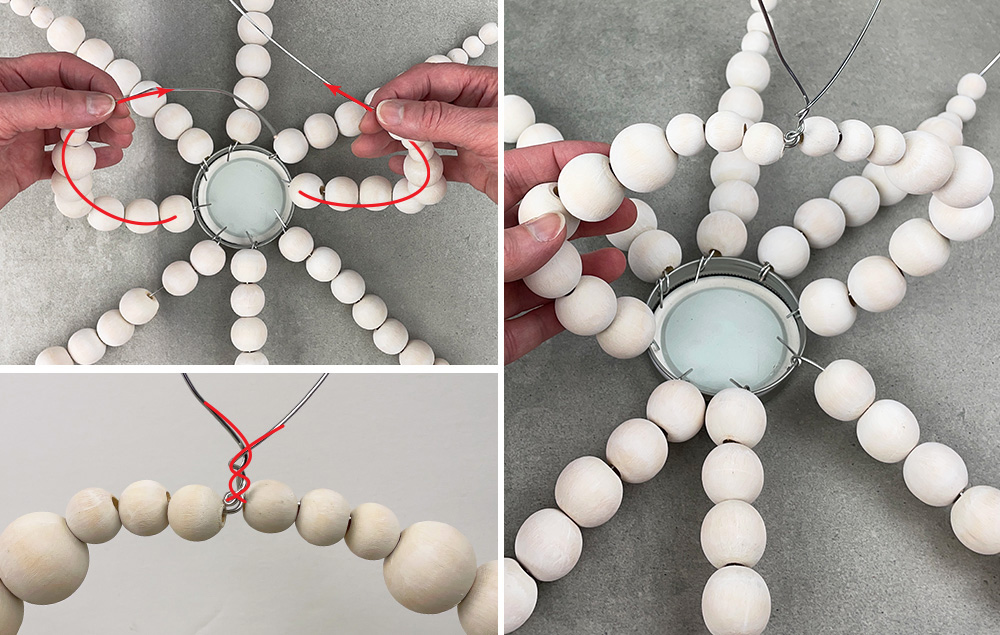
A) Take two opposite wires and bring them together above the jar lid.
B) Twist them together.
C) Bend the beaded wires so that the rounded shape of the pumpkin begins to form.

STEP 7:
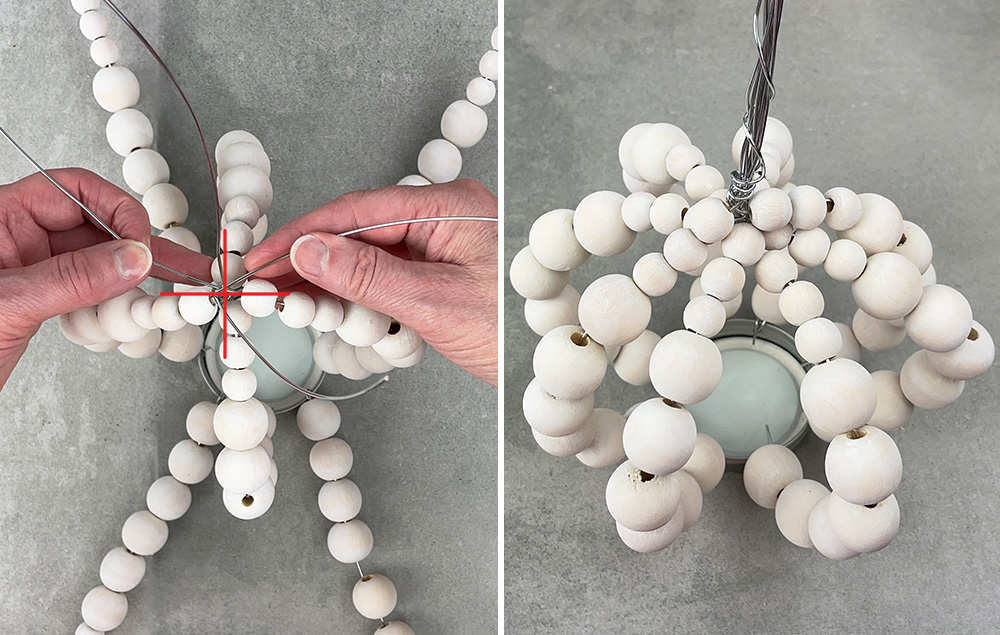
A) Take two more opposite wires and repeat Step 6.
B) Repeat Step 6 for the remaining sets of opposite wires. Twist all the wires together.

STEP 8:
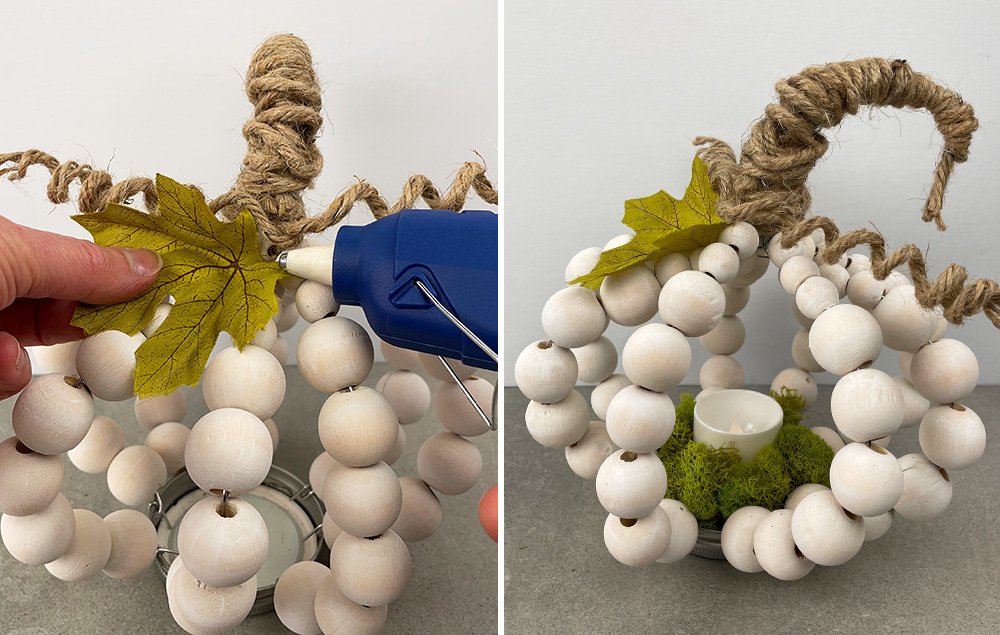
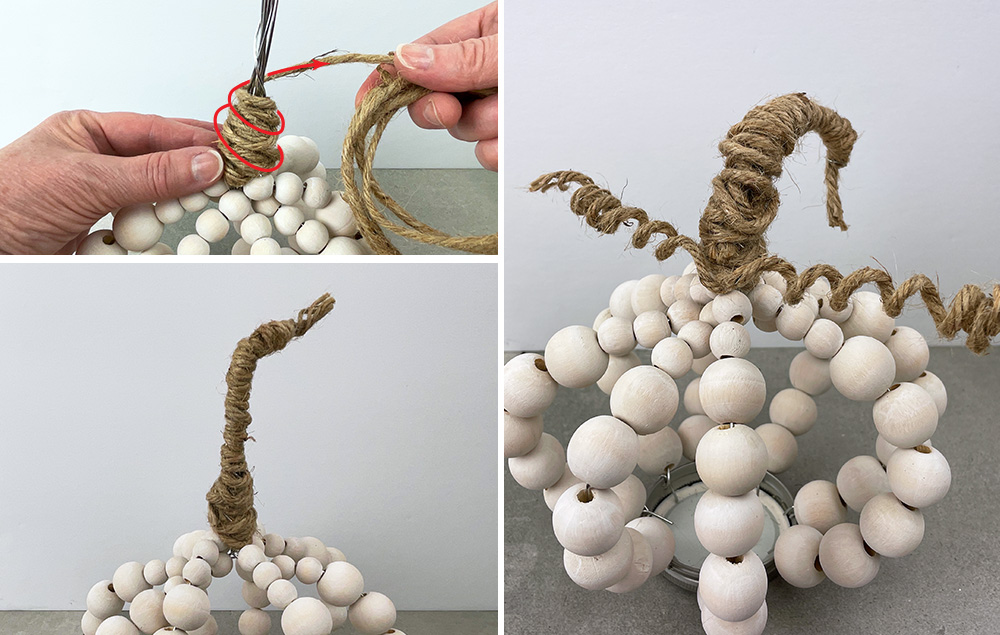
A) Wrap coiled wire around the twisted wires to hide them and begin forming the pumpkin stem. Make several passes with the coiled wire to create a thicker stem.
B) The coiled wire is flexible, allowing you to create an interesting stem shape.
C) Add a few coiled wires for pumpkin stem tendrils. Tip: Wrap the coiled wire around a pencil or wood dowel to get a spiral shape.

STEP 9:
A) Add a leaf accent using a hot glue gun.
B) Add a tea light and moss to the jar lid.
